During pot production, the basic element is the disk, which has predefined characteristics in terms of quality (purity of the metal) and dimensions (diameter and thickness). In the case of rectangular disks, one begins with the outline, and after pressing, shearing of the surplus flange is required.
The production of pots is a complex and multifaceted process that involves a series of intricate steps to transform raw materials into durable, functional, and visually appealing cookware. Each stage plays a crucial role in ensuring the quality, safety, and performance of these essential kitchen tools.
Stage 1: Material Preparation
- Raw Material Selection: The process begins with the selection of high-quality aluminum or stainless steel. These materials are carefully inspected and tested to ensure they meet the required specifications for strength, durability, and safety.
- Blanking: The prepared raw material is blanked into flat sheets of the desired thickness, typically using a blanking press or shearer. Precision is crucial to ensure uniform dimensions and minimize material waste.
Stage 2: Forming and Shaping
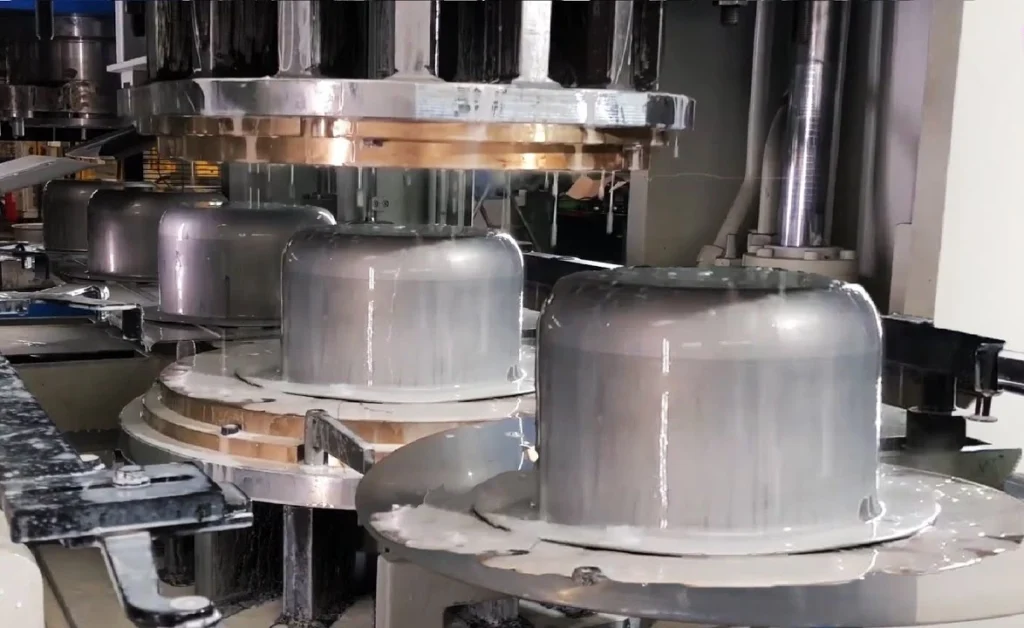
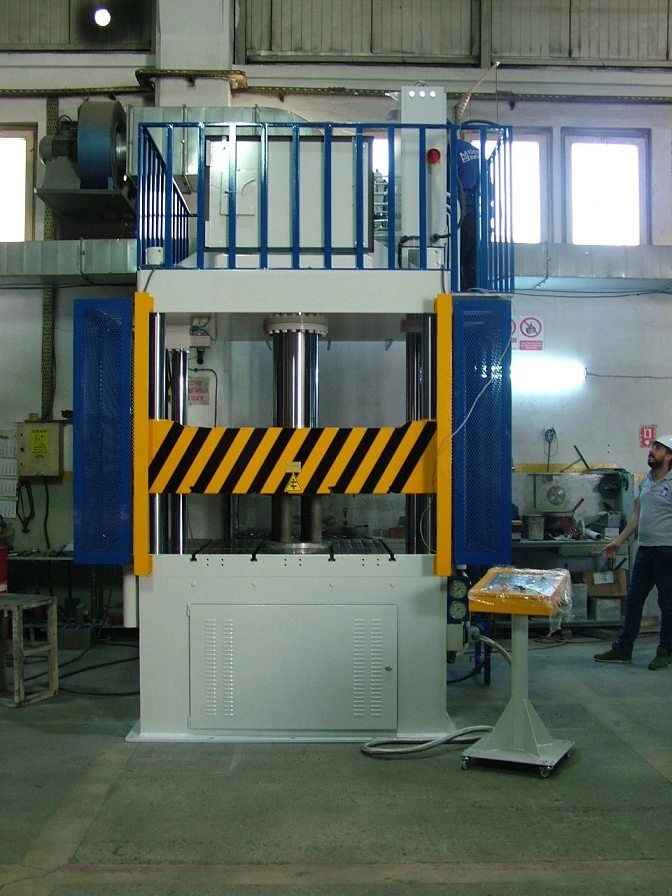
- Deep Drawing: The blanked sheets undergo deep drawing, a process that transforms them into the desired shape of the pot body. This involves forcing the metal sheets into a die cavity using a hydraulic press, creating the deep contours of the pot.
- Trimming: After deep drawing, excess material around the edges of the pot body is trimmed using trimming dies. This ensures precise dimensions and a clean, finished edge.
- Bottom Forming: The bottom of the pot is formed using a spinning or stamping process, depending on the desired shape and thickness. This stage creates a durable and stable base for the pot.
Stage 3: Handle Attachment
- Handle Preparation: The handles, typically made from stainless steel or heat-resistant plastic, are prepared for attachment. This may involve drilling or shaping the handles to fit the pot body.
- Attachment Methods: The handles are securely attached to the pot body using welding or riveting techniques. Welding provides a strong and permanent bond, while riveting offers a detachable option for specific pot designs.
Stage 4: Surface Finishing
- Surface Preparation: The pot undergoes a series of surface preparation processes to achieve a smooth, shiny, and attractive surface. These processes may involve polishing, buffing, sandblasting, or applying protective coatings, depending on the material and desired finish.
- Quality Control: Throughout the production line, rigorous quality control measures are implemented to ensure that the pots meet the required standards for safety, functionality, and aesthetics. This includes visual inspections, dimensional checks, and material testing.
Stage 5: Packaging and Shipping
- Protective Packaging: The finished pots are carefully packaged to protect them during transportation and ensure they reach customers in pristine condition. Packaging materials are selected based on their protective properties, environmental considerations, and aesthetic appeal.
- Shipping Logistics: Efficient shipping logistics are established to ensure timely delivery of the pots to customers. This may involve coordinating with transportation providers, tracking shipments, and managing inventory levels.
Conclusion
The production of pots is a complex and multifaceted endeavor that demands precision, craftsmanship, and a commitment to quality. Each stage plays a vital role in ensuring that these essential cookware pieces meet the highest standards of performance, safety, and durability. As technology advances and consumer preferences evolve, the production process continues to adapt, incorporating innovative techniques and materials to create ever-more functional and durable pots.
Pot Production Stages
The production of pots involves a series of intricate steps that transform raw materials into durable, functional, and visually appealing cookware. Each stage plays a crucial role in ensuring the quality, safety, and performance of these essential kitchen tools.
Stage 1: Material Preparation
- Raw Material Selection: The process begins with the selection of high-quality aluminum or stainless steel. These materials are carefully inspected and tested to ensure they meet the required specifications for strength, durability, and safety.
- Blanking: The prepared raw material is blanked into flat sheets of the desired thickness, typically using a blanking press or shearer. Precision is crucial to ensure uniform dimensions and minimize material waste.
Stage 2: Forming and Shaping
- Deep Drawing: The blanked sheets undergo deep drawing, a process that transforms them into the desired shape of the pot body. This involves forcing the metal sheets into a die cavity using a hydraulic press, creating the deep contours of the pot.
- Trimming: After deep drawing, excess material around the edges of the pot body is trimmed using trimming dies. This ensures precise dimensions and a clean, finished edge.
- Bottom Forming: The bottom of the pot is formed using a spinning or stamping process, depending on the desired shape and thickness. This stage creates a durable and stable base for the pot.
Stage 3: Handle Attachment
- Handle Preparation: The handles, typically made from stainless steel or heat-resistant plastic, are prepared for attachment. This may involve drilling or shaping the handles to fit the pot body.
- Attachment Methods: The handles are securely attached to the pot body using welding or riveting techniques. Welding provides a strong and permanent bond, while riveting offers a detachable option for specific pot designs.
Stage 4: Surface Finishing
- Surface Preparation: The pot undergoes a series of surface preparation processes to achieve a smooth, shiny, and attractive surface. These processes may involve polishing, buffing, sandblasting, or applying protective coatings, depending on the material and desired finish.
- Quality Control: Throughout the production line, rigorous quality control measures are implemented to ensure that the pots meet the required standards for safety, functionality, and aesthetics. This includes visual inspections, dimensional checks, and material testing.
Stage 5: Packaging and Shipping
- Protective Packaging: The finished pots are carefully packaged to protect them during transportation and ensure they reach customers in pristine condition. Packaging materials are selected based on their protective properties, environmental considerations, and aesthetic appeal.
- Shipping Logistics: Efficient shipping logistics are established to ensure timely delivery of the pots to customers. This may involve coordinating with transportation providers, tracking shipments, and managing inventory levels.
Conclusion
The production of pots is a complex and multifaceted endeavor that demands precision, craftsmanship, and a commitment to quality. Each stage plays a vital role in ensuring that these essential cookware pieces meet the highest standards of performance, safety, and durability. As technology advances and consumer preferences evolve, the production process continues to adapt, incorporating innovative techniques and materials to create ever-more functional and durable pots.
Pressing / Turning
1. Pressing
Description:
- Pressing, or stamping, is a metal forming process that involves the use of a press machine to shape flat sheets of metal into the desired pot shape.
Process:
- Material Preparation: Sheets of metal (often aluminum or stainless steel) are prepared for the pressing process.
- Die Design: A die, which is a specialized tool, is designed to create the shape of the pot. The die consists of male and female components that fit together.
- Pressing Operation: The metal sheet is placed between the male and female components of the die, and a press machine exerts force to shape the metal into the desired pot form.
- Trimming and Finishing: After pressing, the excess metal (flash) is trimmed off, and additional processes such as welding handles, attaching bases, or applying coatings may be performed.
Advantages:
- Rapid and cost-effective for mass production.
- High precision and repeatability.
Considerations:
- Initial tooling costs can be high.
- Limited to simpler shapes.
2. Turning (or Spinning)
Description:
- Turning, also known as spinning, is a metalworking process used to form pots, bowls, and other cylindrical shapes from a metal disc or tube.
Process:
- Material Preparation: A metal disc or tube is mounted on a lathe.
- Forming Tool: A forming tool, often shaped like the interior of the pot, is brought into contact with the rotating metal, causing it to take the desired shape.
- Pressure Application: Pressure is applied to the metal by the forming tool, and the metal gradually takes the shape of the tool.
- Trimming and Finishing: Excess metal is trimmed, and additional processes are performed, such as adding handles, finishing surfaces, and applying coatings.
Advantages:
- Well-suited for complex shapes and larger pots.
- Good material thickness control.
Considerations:
- Limited to rotational symmetry.
- Skilled operators are often required.
Additional Considerations
- Material Choice:
- The choice of material (aluminum, stainless steel, copper, etc.) impacts both the pressing and turning processes.
- Surface Finishing:
- After the initial forming, additional processes may include polishing, coating, or finishing to achieve the desired appearance.
- Handles and Attachments:
- Processes such as welding or attaching handles and bases may follow the forming stages.
Both pressing and turning are integral processes in the mass production of pots and cookware. The choice between these methods often depends on the complexity of the pot’s shape, production volume, and the desired characteristics of the final product.
The press forges the disk, which roughly assumes the desired shape. Subsequently, it is touched up to eliminate imperfections and is cleaned, giving the final appearance. For steel pots, a final working step known as polishing is needed, which gives the sheen typical of this metal.
Compared to pressing, it allows easy and quick preparation of the machine, aiding therefore the passage from one size to another in shorter times. It is carried out via the pressure of a lever on the cold sheet, which is modeled
by turning it on the underlying mold (a very similar concept to the manual working of clay).
With the help of computers, modern automatic lathes allow the generation of pieces that are identical to one another, whereas manual lathes still depend on experience and the hand of the operator. For aluminum, the next stage is its passage through the pickling tunnel, which guarantees cleanliness in order to have a container suitable for contact with food
Handles in Pot Production
Handles must meet certain important requirements to allow professional, safe and efficient use. First of all, they must be made of a material that does not conduct heat, to prevent the user from being burnt: for example tubular handles in inox steel are often used. Plastics are largely used only in domestic products, seeing as though in the professional environment high temperatures, long exposure times and the dimensions of the burner can compromise the handles.
One should not be fooled by the design, and instead, more functional aspects should be evaluated such as the safety of the handle and the stability of the joint: therefore the welded joints or the number of rivets with which the handles are applied to the body of the pot are also evaluated. Finally, the ease with which it can be cleaned should also be taken into account.
The application of handles onto copper and aluminum pots is carried out by nailing them onto the body of the pot with particularly resistant alloy rivets (AG5) or with rivets made from the same metal as the container. For steel on the other hand, which is a very hard material, the handles are soldered directly onto the body of the pot. In both cases it is necessary to check that the number of points of attachment is proportional to the dimensions of the recipient.
To guarantee robustness and resistance, the dimensions of the rivets should be assessed. Handles are mostly made from steel, in order to lower the risk of being burnt. Only in the case of copper, is the use of brass handles preferred, and this is due to aesthetic reasons.
Handles are crucial components in pot production, providing a means for users to grip and manipulate the cookware. The design, material, and attachment method of handles play significant roles in the functionality, safety, and aesthetic appeal of the finished pots. Here are key considerations regarding handles in pot production:
1. Material
- Stainless Steel Handles:
- Advantages: Durable, corrosion-resistant, matches well with stainless steel cookware.
- Considerations: Can get hot during cooking, may require additional insulation or design features for heat resistance.
- Plastic Handles:
- Advantages: Lightweight, affordable, available in various colors.
- Considerations: May not be as durable as metal, can melt under high heat.
- Bakelite or Phenolic Resin Handles:
- Advantages: Heat-resistant, stays cool during cooking.
- Considerations: Can become brittle over time.
- Wooden Handles:
- Advantages: Natural and aesthetically pleasing, stays relatively cool.
- Considerations: Requires more care to prevent damage from moisture, may not be as heat-resistant.
- Silicone or Rubber Handles:
- Advantages: Heat-resistant, provides a comfortable grip.
- Considerations: May not be as durable as metal, can wear out over time.
- Combination Handles:
- Advantages: Handles made from a combination of materials, such as stainless steel with a silicone grip for heat resistance.
- Considerations: Offers a balance of durability and comfort.
2. Design
- Ergonomic Designs:
- Advantages: Designed with user comfort in mind, featuring curves and contours.
- Considerations: Material may vary; common in high-end cookware.
- Cool-Touch Handles:
- Advantages: Designed to stay cool during cooking, reducing the risk of burns.
- Considerations: Material varies, often made of heat-resistant materials.
- Detachable Handles:
- Advantages: Handles that can be removed for compact storage.
- Considerations: Materials vary; may be plastic, metal, or a combination.
- Helper Handles:
- Advantages: Additional handles on larger pots for easier lifting and maneuvering.
- Considerations: Enhances stability and control, especially with heavier cookware.
3. Attachment Method
- Riveted Handles:
- Advantages: Rivets provide a strong and secure attachment.
- Considerations: Requires proper sealing to prevent water ingress.
- Welded Handles:
- Advantages: A seamless and modern look.
- Considerations: Quality welding is crucial for durability.
- Screwed or Bolted Handles:
- Advantages: Allows for easy replacement if needed.
- Considerations: Screws or bolts should be durable and resistant to corrosion.
4. Functionality
- Oven-Safe Handles:
- Advantages: Handles designed to withstand oven temperatures.
- Considerations: Materials and design should be suitable for oven use.
- Stay-Cool Handles:
- Advantages: Handles designed to remain cool to the touch during cooking.
- Considerations: Material and design choices are crucial for effective heat resistance.
- Easy-Grip Handles:
- Advantages: Textured or contoured handles for a comfortable and secure grip.
- Considerations: Design should prevent slipping and enhance control.
In pot production, the combination of material, design, and attachment method for handles contributes to the overall quality and user experience of the cookware. Manufacturers often consider factors such as heat resistance, durability, aesthetics, and comfort when selecting and designing handles for their pots.
Thermodiffusion Base and Induction in Pot Production
The use of a thermodiffusion base and induction technology in pot production has revolutionized the way cookware is designed and manufactured, offering enhanced heat distribution, energy efficiency, and versatility. Here’s an in-depth look at these two innovative features:
Thermodiffusion Base
A thermodiffusion base is a multi-layered construction that significantly improves the heat distribution in cookware, particularly those made from aluminum. It typically consists of an aluminum core sandwiched between layers of stainless steel or copper. This combination of materials leverages their unique properties to achieve optimal heat conduction and retention.
Benefits of Thermodiffusion Base
- Enhanced Heat Distribution: The aluminum core, known for its high thermal conductivity, efficiently spreads heat throughout the pot, preventing hot spots and ensuring even cooking.
- Heat Retention: The stainless steel or copper layers provide excellent heat retention, allowing food to cook evenly and thoroughly, even when heat is reduced.
- Versatility: Thermodiffusion bases make cookware suitable for various cooking methods, including stovetop cooking, oven roasting, and slow simmering.
Induction Technology
Induction cooking is a rapidly growing technology that offers precise temperature control, energy efficiency, and safety benefits. It utilizes an electromagnetic field to directly heat the cookware, rather than heating the surrounding surface. This results in faster cooking times and reduced energy consumption.
Benefits of Induction Technology
- Precise Temperature Control: Induction technology provides precise temperature control, allowing cooks to adjust heat levels with greater accuracy and responsiveness.
- Energy Efficiency: Induction cooking is highly energy efficient, as heat is directly generated within the cookware, minimizing heat loss and maximizing energy transfer.
- Safety: Induction cooking offers enhanced safety as the surrounding surface remains relatively cool, reducing the risk of burns.
Integration of Thermodiffusion Base and Induction
The combination of a thermodiffusion base and induction technology is a powerful synergy that enhances the performance of induction cookware. The thermodiffusion base’s efficient heat distribution complements the precise temperature control of induction, resulting in even cooking and energy efficiency.
Conclusion
The thermodiffusion base and induction technology have revolutionized pot production, offering cookware that is not only functional and durable but also energy efficient and safe. As technology advances, the integration of these features will continue to enhance the cooking experience for both home cooks and professional chefs.
The steel pots are endowed with a so-called “thermodiffusion” base, which makes up for the scarce heat conduction characteristic of this metal.
The procedure consists of applying a thick aluminum disk (6-7mm.) on the base of the pot, making it adhere using braze welding. It is possible to apply a second disk over this disk, but this time a steel one, onto which heavy pressure is placed, at a high temperature, aiding adhesion; this is
where the name “sandwich bottom” comes from.
The ferrite composition of this supplementary disk makes the pot suitable also for induction cooking. With a different method, coining, it is also possible to mount a ferrite steel disk on the external base of an aluminum pot, making it also suitable for use on modern electromagnetic induction heat sources. Another way of making an aluminum cooking utensil
suited for induction heat sources is to apply a ferrite layer on the bottom
Tinning of copper
Tinning is a process that involves coating a metal, typically copper, with a thin layer of tin. This process is used for various reasons, including preventing corrosion, improving solderability, and enhancing the appearance of the metal. Tinning can be applied to copper cookware, electrical components, roofing materials, and other items. Here’s an overview of the tinning process for copper:
Tinning Process for Copper
- Surface Preparation:
- The copper surface must be thoroughly cleaned to remove any oxidation, grease, or contaminants. This is typically done through mechanical cleaning, chemical cleaning, or a combination of both.
- Flux Application:
- Flux is applied to the cleaned copper surface. Flux is a chemical agent that helps remove any remaining oxides and promotes the wetting of the metal by the tin. It also prevents the formation of new oxides during the tinning process.
- Tinning Bath:
- The copper object is immersed in a molten tin bath. The temperature of the tin bath is carefully controlled to ensure proper adhesion and coverage. The tin adheres to the copper surface, forming a thin layer.
- Wiping or Drying:
- After the copper object is removed from the tin bath, excess tin may be wiped off or the object may be allowed to cool and solidify. The wiping process helps achieve a uniform coating and removes any excess tin.
- Cleaning:
- The tinned copper object may undergo additional cleaning processes to remove any residual flux or contaminants from the tinning process.
Reasons for Tinning Copper
- Corrosion Resistance:
- Tin is corrosion-resistant, and tinning copper helps protect it from oxidizing and corroding. This is particularly important for copper cookware and other items exposed to moisture.
- Solderability:
- Tinning improves the solderability of copper surfaces. Solder adheres more easily to a tinned surface, facilitating the joining of copper components in electrical applications.
- Appearance:
- Tinning can enhance the appearance of copper, giving it a shiny and uniform surface. This is often desirable for decorative or aesthetic purposes.
- Hygiene:
- In the case of copper cookware, tinning the interior helps create a barrier between the copper and the food, preventing any potential reaction between the copper and acidic or alkaline substances.
Considerations
- Quality of Tin:
- The quality of the tin used in the tinning process is important for achieving a durable and effective coating.
- Adhesion:
- Proper surface preparation and the use of flux are critical for ensuring good adhesion of the tin to the copper.
- Uniformity:
- Achieving a uniform layer of tin is essential for both functional and aesthetic reasons.
- Post-Tinning Treatment:
- Depending on the application, tinned copper objects may undergo additional treatments, such as polishing or coating, to enhance their appearance or provide further protection.
Tinning is a common practice in various industries, and the specific details of the process can vary based on the intended application of the tinned copper.
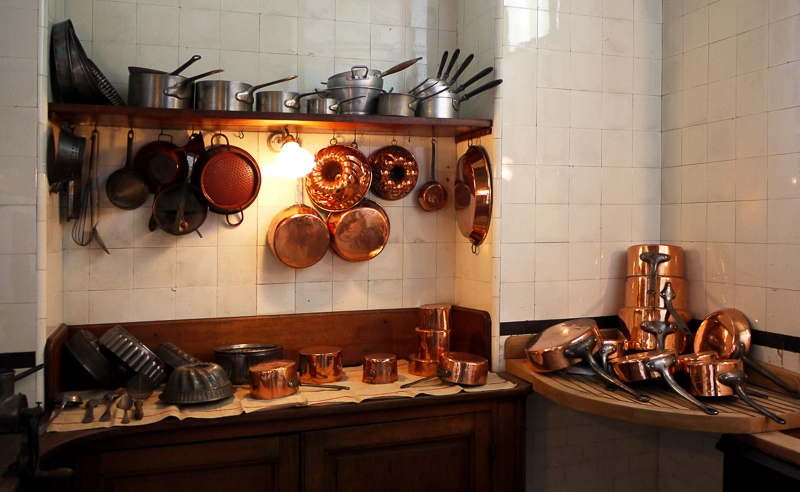
Copper is normally coated with an inert material: tin, which is a good conductor of heat. The best method of tinning is still handcrafting, on the forge, using virgin tin. Processing requires that the surface is first of all brushed, to facilitate the adhesion of the tin to the heated copper.
The recipient is then placed on the forge until the tin reaches its melting temperature, then “pig tin” is passed over the internal surface, which melts like a piece of butter. Finally, the tin is evenly distributed over the
walls, removing the excess with a ball of cotton wool. The tinned vessel is then immersed in a bath of boiling water to clean it and to allow the coating to fix. Tinning can be done repeatedly over time and therefore the pot lasts an eternity.
Antistick coating
Some vessels can be coated internally with a film of plastic material (PTFE) which confers an anti-stick property; such that it allows less fat to be used in cooking and makes it easier to wash. Processing involves an initial phase of preparation of the metal onto which the coating is to be
applied: cleaning or removal of grease, and sanding. Subsequently, there is the application phase, normally of more than one layer, until a thickness is
reached which allows it to perform to its maximum in terms of resistance against friction but also in terms of duration over time. Today two distinct methods of application are used, which give very different results in
terms of quality:
ROLLED: This consists of applying the coating directly bypassing the disk through rollers before the pot has taken on its definitive shape. This allows savings on the cost of processing but lessens the quality and duration of the product. In addition, during pressing, it is possible that the coating can become weak at certain points and can fall off. This type of work is used solely for products destined for domestic use. It can be easily recognized by the horizontal streaks present on the surface.
SPRAYED: Is applied by spraying the material, using the relevant device, directly onto the inside of the body which has already been pressed into its definitive shape, thus preventing any further work from compromising the sticking Painting is done in three steps: firstly the primer with a thickness of 15 microns, followed by passivation, the second phase of painting at 25 microns and the third layer of 6 microns.
Painting with B-ceramic is done in two layers, consisting of a “base ceramic” + “activator” paint, which creates hardness between the layer of aluminum and the finish (paint plus catalyst plus PTFE, to guarantee anti-stick properties at an extremely low dosage). The removable properties in the ceramic painting are based on “Sol-gel” (modified silica) with ceramic particles, which is much less elastic than PTFE and harder, while at the same time more fragile to chipping. It does not guarantee non-stick properties but is just a release agent and its performance is not as good as traditional PTFE.
Ability to conduct heat
The material with which a cooking container is made is the first and most important requirement to take into consideration. The aim of a pot is to cook food, and materials respond to heat conduction in different ways. Thus, the ability to conduct heat is the essential requirement to identify the most suitable instrument for various preparations.
Thermal Conductivity
Thermal conductivity is a property of materials that expresses the heat flux that will flow through the material uniformly and quickly if a certain temperature gradient exists over the material. It is expressed by means of the formula W/m°K. Let’s think about a boiling cup of coffee for example. If we immerse a silver teaspoon, this will burn in an instant, but, on the contrary, one made of steel will remain colder for longer.
A vessel that has a good thermal conductivity allows:
- Effective regulation of temperature at the various stages of cooking
- Uniform distribution of heat over the entire surface, both on the bottom and on the walls.
Energy Saving
In the professional environment, the prolonged use of heat sources becomes a relevant cost when considering the budget of a business, be it big or small. It is therefore important to assess how certain materials can reduce this expense: in fact, the cooking containers with good thermal conductivity will take less time to reach the desired temperatures, consuming less energy.
Specific Weight
The weight of a pot can be a problem in the professional environment due to the necessity to be able to easily manage large utensils with considerable thicknesses. Each material has, from the physical point of view, its own specific weight to bear in mind. For example 1 ft3 of aluminum weighs 168,48lb while 1 ft3 of stainless steel weighs 486,72lb, which means that, on the basis of equal dimensions and thickness, a pot made of S/S weighs three times more than one made of aluminum
Materials for Pot Production
The choice of materials for pot production is crucial for ensuring the quality, performance, and durability of cookware. Different materials offer unique properties that suit specific cooking needs and preferences.
Common Materials for Pot Production
- Aluminum: Aluminum is a lightweight, highly conductive metal that is widely used for pot production due to its ability to heat evenly and quickly. It is also relatively inexpensive and easy to form into various shapes.
- Stainless Steel: Stainless steel is a durable, corrosion-resistant, and non-reactive material that is preferred for its versatility and ease of cleaning. It can withstand high temperatures and is compatible with various cooking methods.
- Cast Iron: Cast iron is a heavy, heat-retaining material that is known for its exceptional durability and even heat distribution. It is ideal for slow cooking, searing, and baking.
- Copper: Copper is an exceptionally conductive metal that provides superior heat distribution and temperature control. It is often used in combination with other materials, such as stainless steel or aluminum, to create cookware with both performance and durability.
- Enameled Steel: Enameled steel is a combination of a steel base coated with a layer of porcelain enamel. The enamel coating provides a non-stick surface that is easy to clean and resistant to staining.
Considerations for Material Selection
When selecting materials for pot production, consider the following factors:
- Cooking Needs: The type of cooking you intend to do will influence the choice of material. For instance, aluminum is ideal for stir-fries and sautéing, while cast iron is suitable for slow cooking and searing.
- Heat Distribution: Consider the material’s ability to distribute heat evenly and prevent hot spots. Aluminum and copper are excellent conductors, while stainless steel is less conductive but still provides even cooking.
- Durability: Choose a material that can withstand regular use and cleaning. Stainless steel and cast iron are known for their durability, while aluminum and enameled steel may require more delicate handling.
- Reactivity: Ensure the material is non-reactive with food, particularly acidic ingredients. Stainless steel and cast iron are generally non-reactive, while aluminum may react with acidic foods.
- Maintenance: Consider the ease of cleaning and maintenance for the chosen material. Stainless steel and enameled steel are generally easy to clean, while cast iron requires more attention to prevent rust.
Conclusion
The selection of materials for pot production is a critical decision that impacts the performance, durability, and overall quality of cookware. By understanding the properties and characteristics of different materials, manufacturers can create cookware that is tailored to specific cooking needs and preferences, ensuring a satisfying and versatile cooking experience for users.
Surface finishing operations are essential processes applied to sheet metal parts to enhance their appearance, functionality, and durability. These operations involve the removal of imperfections, smoothing of surfaces, and application of protective coatings. The importance of surface finishing cannot be overstated, as it directly impacts the performance, longevity, and aesthetic appeal of the final product.
- Key Objectives of Surface Finishing:
- Improve aesthetic appearance.
- Enhance corrosion resistance.
- Reduce friction and wear.
- Remove surface defects.
- Prepare surfaces for further processing.
Overview of Surface Finishing Techniques
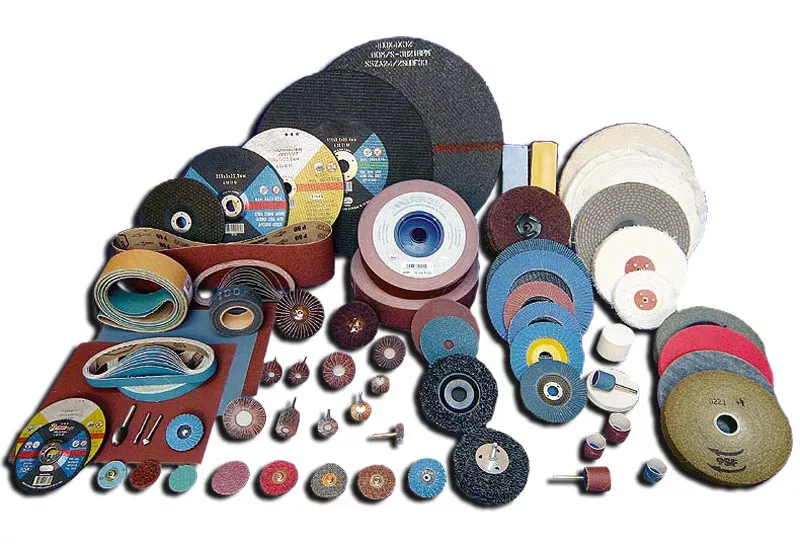
Surface finishing techniques encompass a wide range of processes, each tailored to achieve specific results. The primary techniques include deburring, polishing, and buffing, each serving a unique purpose in the finishing workflow.
- Deburring: The process of removing burrs—tiny protrusions or unwanted materials—from the edges of sheet metal parts.
- Polishing: Involves smoothing and shining the surface to achieve a reflective finish.
- Buffing: A finishing process that further enhances the shine and smoothness of the surface.
Applications in Industry
Surface finishing operations are vital across various industries, including automotive, aerospace, electronics, and consumer goods. The demand for high-quality finishes in these sectors drives innovation and the development of advanced finishing techniques.
- Automotive: Enhancing the appearance and durability of car components.
- Aerospace: Ensuring precision and performance in aircraft parts.
- Electronics: Improving the aesthetic and functional quality of devices.
- Consumer Goods: Increasing the appeal and longevity of products.
Section 2: Deburring in Sheet Metal Parts
Definition and Types of Burrs
Deburring is the process of removing small, unwanted protrusions or burrs that form on the edges of sheet metal parts during manufacturing processes like cutting, drilling, and stamping. Burrs can negatively affect the performance, safety, and appearance of metal parts, making deburring a critical step in the production cycle.
- Types of Burrs:
- Poisson Burr: Caused by material deformation, often appears as a thin edge.
- Roll-Over Burr: Occurs when material is pushed over the edge of a part.
- Tear Burr: Created by tearing of material, resulting in irregular edges.
- Cut-Off Burr: Occurs at the end of the cutting process, often requiring specific removal techniques.
Methods of Burr Removal
The selection of a deburring method depends on factors such as the type of burr, material properties, and desired surface finish. Below are common deburring methods:
Manual Deburring
- Tools Used: Files, scrapers, abrasive pads, and brushes.
- Advantages:
- Cost-effective for small-scale production.
- Provides control over the finishing process.
- Disadvantages:
- Labor-intensive and time-consuming.
- Inconsistent results due to human error.
Mechanical Deburring
- Methods:
- Tumbling: Parts are placed in a tumbler with abrasive media that polishes the edges.
- Vibratory Finishing: Uses vibrations to agitate parts and media for deburring.
- Grinding: Utilizes rotating abrasive wheels to remove burrs.
- Advantages:
- Suitable for large-scale production.
- Consistent and repeatable results.
- Disadvantages:
- May require additional equipment and space.
- Potential for media contamination.
Thermal Deburring
- Process: Involves exposing parts to a controlled explosion of gas to burn away burrs.
- Advantages:
- Effective for hard-to-reach areas.
- Fast and efficient for complex parts.
- Disadvantages:
- High initial setup cost.
- Limited to specific materials.
Electrochemical Deburring
- Process: Involves the use of electrolytic solutions to dissolve burrs.
- Advantages:
- Precise and controlled removal.
- Minimal tool wear.
- Disadvantages:
- Requires careful handling of chemicals.
- High operational costs.
Tools and Equipment Used
- Manual Tools: Files, sandpaper, brushes.
- Mechanical Equipment: Tumblers, grinders, vibratory finishers.
- Advanced Equipment: Thermal deburring machines, electrochemical setups.
Challenges in Deburring
- Material Compatibility: Different materials require specific deburring techniques.
- Cost Considerations: Balancing cost and efficiency in high-volume production.
- Quality Control: Ensuring consistent results across batches.
Case Studies
Case Study 1: Automotive Component Deburring
- Objective: Improve the precision and safety of automotive parts.
- Method Used: Mechanical deburring with vibratory finishing.
- Outcome: Enhanced safety and performance of components, reduced production time.
Case Study 2: Aerospace Part Deburring
- Objective: Achieve high precision and reliability in aircraft parts.
- Method Used: Electrochemical deburring for intricate components.
- Outcome: Improved accuracy and reliability, meeting industry standards.
Section 3: Polishing of Sheet Metal Parts

Definition and Purpose
Polishing is a surface finishing process aimed at smoothing and shining metal parts to achieve a reflective finish. It enhances the appearance and functionality of metal parts by removing scratches, pits, and other imperfections.
- Purpose of Polishing:
- Improve aesthetic appeal.
- Increase corrosion resistance.
- Enhance surface smoothness and reflectivity.
- Prepare surfaces for further coating or finishing processes.
Polishing Techniques
Various polishing techniques are employed based on the desired finish and application requirements.
Mechanical Polishing
- Process: Involves the use of abrasive materials to remove surface irregularities.
- Techniques:
- Belt Polishing: Uses abrasive belts for continuous polishing.
- Disk Polishing: Utilizes rotating disks with abrasive pads.
- Buffing Wheels: Employs rotating cloth wheels with polishing compounds.
- Advantages:
- Cost-effective and versatile.
- Suitable for various metals and shapes.
- Disadvantages:
- Limited precision for complex geometries.
- Requires skilled operators for optimal results.
Electropolishing
- Process: Involves the use of an electrolytic bath to dissolve the surface layer of metal, resulting in a smooth and shiny finish.
- Advantages:
- Superior surface finish and reflectivity.
- Removes microscopic imperfections.
- Enhances corrosion resistance.
- Disadvantages:
- High setup and operational costs.
- Limited to specific metals and applications.
Tools and Equipment Used
- Abrasive Belts and Disks: Used for mechanical polishing.
- Buffing Wheels and Compounds: For fine finishing.
- Electropolishing Equipment: Includes electrolytic baths and power supplies.
Comparison of Different Polishing Methods
| Method | Advantages | Disadvantages |
|---|---|---|
| Mechanical | Cost-effective, versatile | Limited precision for complex parts |
| Electropolishing | Superior finish, corrosion resistance | High cost, limited material compatibility |
Applications in Various Industries
- Automotive: Enhancing the appearance of exterior and interior components.
- Medical Devices: Ensuring the smoothness and biocompatibility of implants and tools.
- Aerospace: Improving the aerodynamics and aesthetics of aircraft parts.
- Consumer Electronics: Enhancing the visual appeal of devices and components.
Challenges and Solutions
- Surface Uniformity: Achieving consistent finishes across complex geometries.
- Material Constraints: Adapting techniques for various metals and alloys.
- Environmental Concerns: Managing waste and emissions from polishing processes.
Section 4: Buffing Process for Sheet Metal Parts
Definition and Difference from Polishing
Buffing is a surface finishing process that involves the use of soft cloth wheels and polishing compounds to achieve a high-gloss finish on metal surfaces. While similar to polishing, buffing focuses on enhancing the final appearance rather than removing significant surface imperfections.
- Difference from Polishing:
- Polishing: Involves removing surface material to smooth and refine.
- Buffing: Focuses on creating a high-gloss, reflective finish.
Buffing Techniques
Different buffing techniques are employed based on the desired finish and complexity of the parts.
Manual Buffing
- Process: Involves the use of hand-held buffing wheels and compounds.
- Advantages:
- Flexibility for small-scale production.
- Control over the finishing process.
- Disadvantages:
- Labor-intensive and time-consuming.
- Inconsistent results due to human error.
Automatic Buffing
- Process: Utilizes automated machines and robotic arms for buffing.
- Advantages:
- Suitable for large-scale production.
- Consistent and repeatable results.
- Disadvantages:
- High initial setup cost.
- Limited flexibility for intricate parts.
Buffing Compounds and Materials
Buffing compounds are essential for achieving desired finishes and vary based on the material and application.
- Types of Buffing Compounds:
- Tripoli: Used for initial cutting and smoothing.
- Rouge: Provides a high-gloss finish.
- White Diamond: Removes light scratches and enhances shine.
- Materials Used:
- Cloth Wheels: Made from cotton, flannel, or sisal.
- Buffing Pads: Available in various grades for different finishes.
Tools and Equipment Used
- Buffing Machines: Includes bench grinders and automated buffing stations.
- Buffing Wheels and Pads: Available in different sizes and materials.
- Polishing Compounds: Formulated for specific applications and finishes.
Applications in Various Industries
- Jewelry: Enhancing the luster and appeal of metal pieces.
- Automotive: Achieving high-gloss finishes on body panels and trim.
- Furniture: Polishing metal components for aesthetic appeal.
- Consumer Goods: Improving the appearance of household items and appliances.
Advantages and Limitations
- Advantages:
- Enhances aesthetic appeal and surface smoothness.
- Suitable for various metals and applications.
- Limitations:
- Limited material removal capability.
- Requires careful handling to avoid surface damage.
Section 5: Comparison of Deburring, Polishing, and Buffing
Differences in Techniques and Applications
| Process | Purpose | Applications |
|---|---|---|
| Deburring | Remove burrs and imperfections | Manufacturing, machining |
| Polishing | Smooth and shine surfaces | Automotive, aerospace, electronics |
| Buffing | Enhance gloss and appearance | Jewelry, consumer goods, automotive |
Suitability for Different Types of Sheet Metal
- Deburring: Essential for parts with sharp edges and complex geometries.
- Polishing: Suitable for achieving reflective finishes on flat and contoured surfaces.
- Buffing: Ideal for enhancing the appearance of decorative and high-visibility parts.
Cost and Time Considerations
- Deburring: Cost-effective for high-volume production, but may require specialized equipment.
- Polishing: Balances cost with desired finish quality, may involve multiple steps.
- Buffing: Cost-effective for achieving high-gloss finishes, but may require additional polishing.
Environmental and Safety Considerations
- Deburring: Potential for media and chemical contamination, requires proper disposal.
- Polishing: Generates dust and waste, necessitating effective ventilation and filtration.
- Buffing: Involves the use of chemicals, requires protective equipment and safety measures.
Section 6: Advancements in Surface Finishing Technologies
Automation and Robotics
The integration of automation and robotics in surface finishing operations has revolutionized the industry, offering improved efficiency, precision, and consistency.
- Benefits of Automation:
- Reduced labor costs and human error.
- Enhanced precision and repeatability.
- Increased production speed and efficiency.
- Applications:
- Robotic deburring for intricate parts.
- Automated polishing systems for large components.
- Intelligent buffing machines with adaptive control.
Innovative Materials and Techniques
Advancements in materials and techniques continue to drive improvements in surface finishing processes.
- Innovative Materials:
- Advanced Abrasives: Developments in abrasive materials enhance cutting and polishing efficiency.
- Eco-Friendly Compounds: Formulations that reduce environmental impact and improve safety.
- New Techniques:
- Laser Deburring: Uses laser beams to remove burrs with precision.
- Nano-Polishing: Employs nanotechnology for superior surface finishes.
Impact of Industry 4.0
Industry 4.0 is reshaping surface finishing operations through the integration of smart technologies and data-driven approaches.
- Key Aspects of Industry 4.0:
- IoT Connectivity: Enables real-time monitoring and control of finishing processes.
- Data Analytics: Provides insights into process optimization and quality control.
- AI and Machine Learning: Enhances decision-making and process automation.
Case Studies on Modern Applications
Case Study 1: Automotive Industry
- Objective: Improve production efficiency and finish quality.
- Solution: Implementation of robotic polishing systems with IoT connectivity.
- Outcome: Increased production speed, reduced defects, and enhanced finish quality.
Case Study 2: Aerospace Industry
- Objective: Achieve high precision and consistency in aircraft parts.
- Solution: Integration of AI-driven deburring and polishing systems.
- Outcome: Improved accuracy, reduced waste, and compliance with industry standards.
Section 7: Best Practices and Quality Control
Quality Standards and Certifications
Adhering to quality standards and certifications ensures the reliability and performance of surface-finished parts.
- Key Standards:
- ISO 9001: Quality management systems for consistent product quality.
- ISO 14001: Environmental management standards for sustainable practices.
- NADCAP: Aerospace industry standards for process quality and control.
Inspection Techniques
Effective inspection techniques are crucial for maintaining the quality and consistency of finished parts.
- Visual Inspection: Identifying surface defects and irregularities.
- Dimensional Inspection: Measuring critical dimensions and tolerances.
- Surface Roughness Testing: Assessing surface smoothness and texture.
- Non-Destructive Testing: Evaluating structural integrity without damaging parts.
Process Optimization
Optimizing surface finishing processes enhances efficiency and reduces costs.
- Key Strategies:
- Lean Manufacturing: Minimizing waste and improving workflow.
- Continuous Improvement: Implementing feedback loops for process refinement.
- Process Automation: Utilizing technology for increased efficiency and precision.
Safety Measures and Precautions
Ensuring safety in surface finishing operations is paramount to protect workers and the environment.
- Safety Precautions:
- Personal Protective Equipment (PPE): Gloves, masks, goggles, and protective clothing.
- Ventilation and Filtration: Effective air quality management to reduce dust and fumes.
- Training and Education: Ongoing training programs for workers to ensure safe practices.
Section 8: Conclusion
Summary of Key Points
- Surface finishing operations, including deburring, polishing, and buffing, are essential for enhancing the appearance, functionality, and durability of sheet metal parts.
- Deburring removes burrs and imperfections, while polishing smooths and shines surfaces, and buffing enhances gloss and appearance.
- Advancements in technology, automation, and materials continue to drive improvements in surface finishing processes.
Future Trends in Surface Finishing
The future of surface finishing operations will be shaped by continued advancements in automation, materials, and sustainability.
- Emerging Trends:
- Green Technologies: Development of eco-friendly compounds and processes.
- Advanced Robotics: Increased use of robotics for precision and efficiency.
- Smart Manufacturing: Integration of IoT and AI for data-driven process optimization.
Final Thoughts
Surface finishing operations are a vital component of modern manufacturing, contributing to the quality and performance of sheet metal parts across various industries. By staying abreast of technological advancements and best practices, manufacturers can achieve superior finishes and meet the evolving demands of the market.
Types of Polishing
Polishing is primarily categorized into mechanical and chemical methods, each serving different purposes and achieving unique results.
1. Mechanical Polishing
Mechanical polishing involves using abrasive tools and materials to physically remove surface material and achieve a smooth, reflective finish.
a. Belt Polishing
- Process: Uses abrasive belts that continuously rotate around rollers to polish the surface of the metal.
- Applications: Ideal for flat surfaces and edges.
- Advantages: Cost-effective, easy to set up, and suitable for removing larger imperfections.
- Commonly Used Materials:
- Aluminum Oxide: A widely used abrasive for general-purpose polishing.
- Silicon Carbide: Suitable for hard metals and provides a fine finish.
b. Disk Polishing
- Process: Utilizes rotating disks with abrasive pads to polish surfaces.
- Applications: Suitable for curved and irregular surfaces.
- Advantages: Provides uniform pressure and can reach tight spots.
- Commonly Used Materials:
- Diamond Abrasives: Known for cutting efficiency and durability, especially on hard metals.
- Ceramic Abrasives: Used for rapid stock removal and fine finishes.
c. Buffing Wheels
- Process: Employs cloth wheels coated with polishing compounds to achieve a high-gloss finish.
- Applications: Suitable for finishing and enhancing shine on metal surfaces.
- Advantages: Produces a mirror-like finish, ideal for aesthetic applications.
- Commonly Used Materials:
- Cotton and Flannel Wheels: Provide softness and flexibility, allowing for smooth finishes.
- Sisal Wheels: Used for cutting and initial buffing stages due to their firmness.
d. Vibratory Polishing
- Process: Involves placing parts in a vibrating container filled with abrasive media and compounds.
- Applications: Ideal for small and complex parts that require even polishing.
- Advantages: Provides consistent finishes, handles large volumes, and reduces manual labor.
- Commonly Used Materials:
- Ceramic Media: Effective for heavy cutting and smoothing.
- Plastic Media: Used for delicate parts and achieving fine finishes.
2. Chemical and Electrochemical Polishing
Chemical and electrochemical polishing methods involve the use of chemical reactions to remove surface material and achieve a smooth finish.
a. Electropolishing
- Process: Uses an electrolytic bath to dissolve the surface layer of metal, smoothing and leveling the surface.
- Applications: Commonly used in industries requiring high precision and cleanliness, such as medical and food processing.
- Advantages: Removes microscopic burrs, enhances corrosion resistance, and improves surface reflectivity.
- Commonly Used Materials:
- Electrolytic Solutions: Acidic solutions containing phosphoric and sulfuric acids.
- Anodes and Cathodes: Typically made from stainless steel or titanium for durability.
b. Chemical Polishing
- Process: Involves submerging the metal in a chemical solution that selectively removes surface material.
- Applications: Suitable for intricate shapes and areas difficult to reach with mechanical methods.
- Advantages: Provides uniform finishes and is effective for complex geometries.
- Commonly Used Materials:
- Acidic Solutions: Mixtures of nitric, hydrochloric, and sulfuric acids tailored to specific metals.
- Additives: Agents that control the polishing rate and improve surface quality.
3. Abrasive Polishing
Abrasive polishing uses fine abrasive particles to refine the surface, removing minor scratches and achieving a high level of smoothness.
a. Sandblasting
- Process: Propels fine abrasive particles against the surface of the metal to remove contaminants and smoothen the surface.
- Applications: Suitable for preparing surfaces for painting or coating.
- Advantages: Fast and effective for large surfaces and tough residues.
- Commonly Used Materials:
- Silica Sand: Traditional abrasive for general-purpose sandblasting.
- Glass Beads: Provides a smoother finish and is less aggressive than sand.
- Garnet: Known for its hardness and sharpness, ideal for heavy-duty applications.
b. Lapping
- Process: Involves using a lapping plate and abrasive slurry to achieve a fine, flat surface finish.
- Applications: Used in precision applications requiring tight tolerances, such as in optics and semiconductor industries.
- Advantages: Produces extremely flat surfaces and fine finishes.
- Commonly Used Materials:
- Diamond Slurry: Provides precision and is used for hard materials.
- Aluminum Oxide Slurry: Suitable for softer materials and less abrasive applications.
c. Micro-Abrasive Blasting
- Process: Uses a controlled stream of micro-abrasive particles to remove fine surface layers.
- Applications: Ideal for delicate and detailed parts requiring precision.
- Advantages: Highly controlled process, reduces risk of surface damage.
- Commonly Used Materials:
- Aluminum Oxide Powder: Common for general applications and provides a good balance of cutting and polishing.
- Sodium Bicarbonate: Gentle abrasive for sensitive materials.
Materials Used in Polishing
The choice of materials used in polishing depends on the type of metal, desired finish, and specific polishing method. Below are commonly used materials and compounds in metal polishing:
1. Abrasive Materials
- Aluminum Oxide: A versatile and widely used abrasive for various metals, including steel and aluminum. It provides a good balance between cutting and finishing capabilities.
- Silicon Carbide: Known for its hardness and sharpness, it is used for polishing hard metals and achieving a smooth surface.
- Diamond Abrasives: Offers superior cutting efficiency and is ideal for polishing hard and brittle metals, such as tungsten and ceramics.
- Ceramic Abrasives: Used for heavy-duty applications, offering high material removal rates and durability.
2. Polishing Compounds
Polishing compounds are essential in achieving the desired finish and are formulated for specific metals and applications.
a. Tripoli Compound
- Description: A coarse compound used for initial cutting and smoothing of surfaces.
- Applications: Commonly used on softer metals like aluminum and brass to remove scratches and surface imperfections.
b. Rouge Compound
- Description: A fine polishing compound used for achieving a high-gloss finish.
- Applications: Ideal for polishing precious metals such as gold and silver, as well as achieving a mirror-like finish on stainless steel.
c. White Diamond Compound
- Description: A versatile compound used for polishing and refining surfaces.
- Applications: Suitable for use on plastics and metals, providing a bright finish and removing light scratches.
d. Green Chromium Oxide Compound
- Description: A compound containing chromium oxide, used for achieving a fine finish.
- Applications: Ideal for polishing stainless steel and other hard metals, providing a high level of smoothness and shine.
3. Polishing Pads and Wheels
Polishing pads and wheels come in various materials and are selected based on the desired finish and application requirements.
- Cotton Buffing Wheels: Soft and flexible, suitable for applying polishing compounds and achieving a smooth finish.
- Flannel Buffing Wheels: Provide a finer finish and are often used in the final buffing stage.
- Sisal Buffing Wheels: Firm and durable, used for cutting and initial buffing stages.
- Foam Polishing Pads: Used in conjunction with polishing compounds for fine finishing and detailing.
4. Chemical Solutions
Chemical solutions play a critical role in chemical and electrochemical polishing processes, providing the necessary reactions to achieve desired surface finishes.
- Electrolytic Solutions: Composed of acids like phosphoric and sulfuric acids, used in electropolishing to dissolve surface material and enhance smoothness.
- Chemical Polishing Solutions: Tailored mixtures of acids and additives designed for specific metals and applications, providing controlled material removal and surface refinement.
Conclusion
Polishing is a vital surface finishing process that enhances the appearance and functionality of metal parts. By understanding the various polishing methods and materials, manufacturers can achieve the desired finishes for different applications and industries. Whether through mechanical, chemical, or abrasive techniques, the choice of polishing materials and compounds plays a crucial role in achieving high-quality surface finishes.
Best Polishing Methods for Metal
Polishing metal surfaces is a critical step in many manufacturing processes, enhancing both the aesthetic appeal and functional properties of metal parts. The best polishing methods depend on various factors, including the type of metal, the desired finish, and specific application requirements. Below, we’ll explore some of the most effective polishing methods and their respective advantages, disadvantages, and suitable applications.
1. Mechanical Polishing
Mechanical polishing is one of the most commonly used methods due to its versatility and effectiveness in achieving smooth, shiny surfaces. This method involves using abrasive materials to physically remove surface imperfections.
a. Belt Polishing
Process: Belt polishing uses continuous abrasive belts to grind and polish metal surfaces. It is suitable for flat and slightly curved surfaces.
- Advantages:
- Cost-effective and suitable for high-volume production.
- Can handle a wide range of metals, including steel, aluminum, and brass.
- Efficient at removing larger surface imperfections.
- Disadvantages:
- Limited precision for intricate parts and complex geometries.
- May require additional finishing steps to achieve a mirror-like finish.
- Applications:
- Automotive parts such as body panels and bumpers.
- Large metal sheets and plates.
- Metal furniture components.
b. Disk Polishing
Process: Disk polishing involves rotating abrasive disks to smooth and shine metal surfaces. It is often used for smaller or more intricate parts.
- Advantages:
- Provides uniform pressure and consistent results.
- Suitable for complex shapes and small parts.
- Versatile for a range of metals and finishes.
- Disadvantages:
- Requires skilled operators to avoid over-polishing.
- Limited to flat and moderately curved surfaces.
- Applications:
- Jewelry and small metal components.
- Precision instruments and tools.
- Metal parts with intricate designs.
c. Vibratory Polishing
Process: Vibratory polishing involves placing metal parts in a vibrating container filled with abrasive media and compounds. The vibrations cause the media to polish the surfaces of the parts.
- Advantages:
- Ideal for large batches of small parts.
- Provides even polishing across surfaces.
- Reduces manual labor and operator fatigue.
- Disadvantages:
- Slower than other mechanical methods.
- Limited to smaller parts and components.
- Applications:
- Small automotive components.
- Hardware and fasteners.
- Jewelry and decorative items.
d. Buffing Wheels
Process: Buffing involves using cloth wheels and polishing compounds to achieve a high-gloss finish on metal surfaces. It is often used as a final finishing step.
- Advantages:
- Achieves a mirror-like, high-gloss finish.
- Suitable for a wide range of metals, including stainless steel and aluminum.
- Enhances the aesthetic appeal of metal surfaces.
- Disadvantages:
- Limited material removal capability.
- Requires careful handling to avoid surface damage.
- Applications:
- Automotive trim and decorative parts.
- Consumer electronics and appliances.
- Jewelry and luxury goods.
2. Chemical and Electrochemical Polishing
Chemical and electrochemical polishing methods use chemical reactions to smooth and refine metal surfaces, offering high precision and uniform finishes.
a. Electropolishing
Process: Electropolishing involves submerging metal parts in an electrolytic bath, where controlled electrical currents dissolve the surface layer of the metal, smoothing and leveling it.
- Advantages:
- Produces superior surface finishes with excellent reflectivity.
- Removes microscopic burrs and imperfections.
- Enhances corrosion resistance and passivation of metals.
- Disadvantages:
- High initial setup and operational costs.
- Limited to conductive materials like stainless steel, titanium, and aluminum.
- Applications:
- Medical devices and implants.
- Food processing equipment.
- Aerospace components.
b. Chemical Polishing
Process: Chemical polishing involves immersing metal parts in a chemical solution that selectively removes surface material, refining and smoothing the surface.
- Advantages:
- Uniform finishes on complex geometries.
- Suitable for delicate parts and thin-walled components.
- Reduces surface stress and improves fatigue resistance.
- Disadvantages:
- Requires precise control of chemical concentrations and temperature.
- Potential environmental and safety concerns with chemical handling.
- Applications:
- Intricate metal parts and components.
- Electronics and semiconductor industries.
- Decorative metal products.
3. Abrasive Polishing
Abrasive polishing methods involve using fine abrasive particles to achieve a smooth and refined surface finish, often used for precision applications.
a. Lapping
Process: Lapping uses a lapping plate and abrasive slurry to achieve flat, smooth surfaces with tight tolerances. It is often used for precision applications.
- Advantages:
- Achieves extremely flat and smooth surfaces.
- Suitable for high-precision parts and components.
- Provides tight tolerances and uniform finishes.
- Disadvantages:
- Requires specialized equipment and expertise.
- Limited to flat surfaces and precision applications.
- Applications:
- Optics and lenses.
- Semiconductor wafers.
- Precision mechanical components.
b. Micro-Abrasive Blasting
Process: Micro-abrasive blasting uses a controlled stream of micro-abrasive particles to remove fine surface layers and achieve precision finishes.
- Advantages:
- Highly controlled process for precision applications.
- Suitable for delicate and detailed parts.
- Minimizes surface damage and distortion.
- Disadvantages:
- Limited to small areas and precision applications.
- Requires specialized equipment and expertise.
- Applications:
- Aerospace and aviation components.
- Medical devices and instruments.
- Precision electronics and circuit boards.
Comparison of Polishing Methods
Here’s a table comparing the various polishing methods to highlight their advantages, disadvantages, and applications:
| Method | Advantages | Disadvantages | Applications |
|---|---|---|---|
| Belt Polishing | Cost-effective, handles large surfaces | Limited precision, may require additional finishing | Automotive parts, large metal sheets |
| Disk Polishing | Uniform pressure, suitable for intricate parts | Skilled operation required, limited to flat surfaces | Jewelry, precision instruments, complex shapes |
| Vibratory Polishing | Even polishing, suitable for large batches | Slower process, limited to small parts | Small automotive components, hardware, jewelry |
| Buffing Wheels | Achieves high-gloss finish, enhances aesthetics | Limited material removal, requires careful handling | Automotive trim, consumer electronics, jewelry |
| Electropolishing | Superior finishes, removes microscopic burrs, enhances corrosion resistance | High setup costs, limited to conductive materials | Medical devices, food processing, aerospace components |
| Chemical Polishing | Uniform finishes on complex geometries, reduces surface stress | Precise control required, environmental concerns | Intricate parts, electronics, decorative products |
| Lapping | Extremely flat surfaces, tight tolerances | Requires specialized equipment, limited to flat surfaces | Optics, semiconductor wafers, precision components |
| Micro-Abrasive Blasting | Controlled process, suitable for delicate parts | Limited to small areas, requires specialized equipment | Aerospace components, medical devices, precision electronics |
Factors to Consider When Choosing a Polishing Method
Selecting the best polishing method for a specific application involves considering several key factors:
- Material Type: Different metals have varying properties, such as hardness and corrosion resistance, that affect their suitability for specific polishing methods. For example, stainless steel benefits from electropolishing due to its corrosion resistance, while softer metals like aluminum can be effectively polished using mechanical methods.
- Desired Finish: The intended appearance and surface quality of the finished product influence the choice of polishing method. For instance, a high-gloss finish may require buffing, while a matte finish could be achieved with abrasive blasting.
- Component Geometry: The shape and complexity of the metal parts play a crucial role in determining the most suitable polishing method. Intricate geometries may require chemical or electrochemical polishing for uniform finishes, while flat surfaces can be efficiently polished using mechanical methods.
- Production Volume: The scale of production impacts the choice of polishing method, with high-volume production benefiting from automated mechanical processes and small-batch or custom work requiring more manual techniques.
- Cost and Efficiency: The overall cost and efficiency of the polishing process, including equipment, labor, and materials, must be evaluated to determine the most cost-effective solution without compromising quality.
- Environmental and Safety Considerations: The environmental impact and safety of the polishing process, including waste management and operator safety, should be considered when selecting a method. Chemical processes may require special handling and disposal procedures, while mechanical methods can generate dust and noise.
Conclusion
Polishing is a vital process in the metalworking industry, significantly impacting the appearance and functionality of metal parts. By understanding the strengths and limitations of each polishing method, manufacturers can select the most appropriate technique to achieve the desired finish and meet specific application requirements. Whether through mechanical, chemical, or abrasive methods, the choice of polishing technique plays a critical role in producing high-quality, durable metal products.
What is Industrial Buffing?
Industrial buffing is a crucial process in the metal finishing industry, aimed at enhancing the appearance and functional properties of metal surfaces. It involves using buffing wheels and compounds to produce smooth, reflective finishes on various metal products. This section will explore the methods, materials, applications, and advancements in industrial buffing, providing a comprehensive understanding of this essential metalworking technique.
Industrial buffing is a surface finishing process used to achieve a high-gloss, mirror-like finish on metal surfaces. It involves using buffing wheels made from cloth, felt, or other materials, along with buffing compounds, to polish and smoothen the surface of metal parts. Buffing is often the final step in the finishing process, following grinding or polishing, to achieve the desired surface quality.
Objectives of Industrial Buffing
- Enhance Aesthetic Appeal: Buffing improves the visual appearance of metal parts by creating a reflective, glossy surface.
- Improve Surface Smoothness: The process removes fine scratches and imperfections, resulting in a smooth, even surface.
- Increase Corrosion Resistance: A polished surface can help reduce the risk of corrosion by minimizing surface irregularities where moisture could accumulate.
- Prepare for Further Coating: Buffing can prepare metal surfaces for additional coatings, such as paint or plating, by ensuring a smooth base.
Buffing Methods
Industrial buffing can be performed using various methods, each tailored to specific applications and desired finishes. Below are the primary methods used in industrial buffing:
1. Manual Buffing
Manual buffing involves skilled operators using hand-held buffing tools to polish metal surfaces. This method is often used for small-scale production or intricate parts requiring precise attention to detail.
- Advantages:
- Provides greater control over the buffing process.
- Suitable for complex shapes and detailed work.
- Allows for adjustments during the process to achieve the desired finish.
- Disadvantages:
- Labor-intensive and time-consuming.
- Inconsistent results due to human error.
- Limited to small production volumes.
- Applications:
- Jewelry and decorative items.
- Small automotive components.
- Custom metalwork.
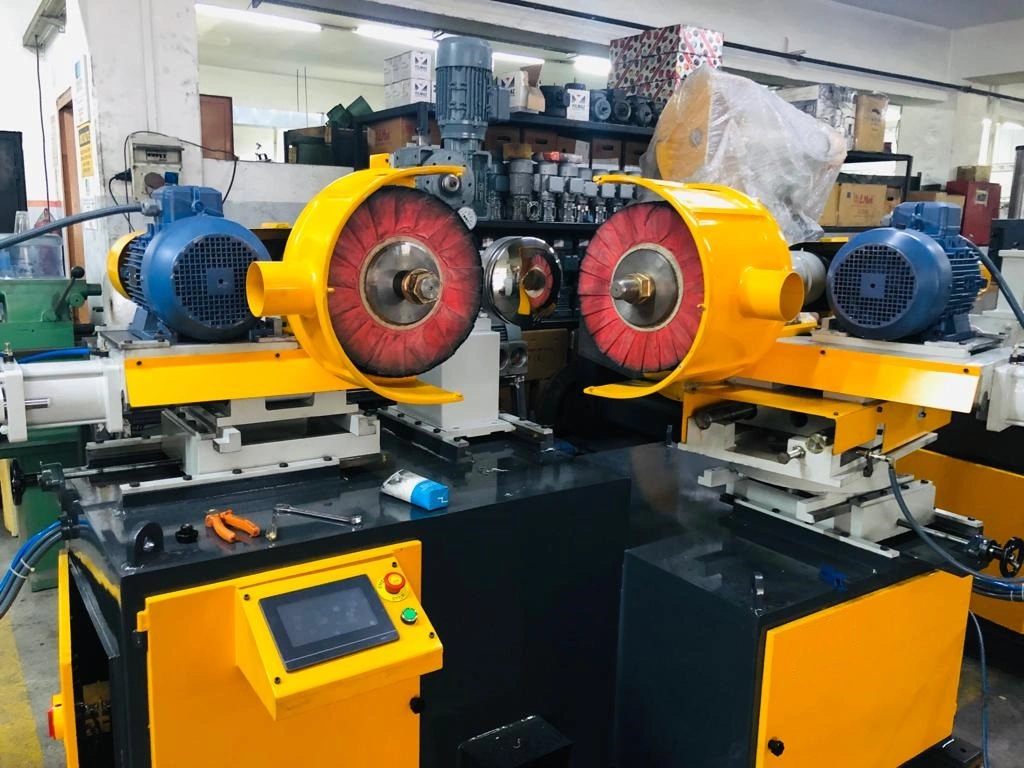
2. Automated Buffing
Automated buffing employs machines and robotic systems to buff metal surfaces, offering consistent and efficient results for large-scale production.
- Advantages:
- High-speed production and consistent quality.
- Reduces labor costs and human error.
- Capable of handling large and complex parts.
- Disadvantages:
- High initial setup and equipment costs.
- Limited flexibility for intricate parts or custom finishes.
- Applications:
- Automotive parts and assemblies.
- Household appliances and electronics.
- Aerospace components.
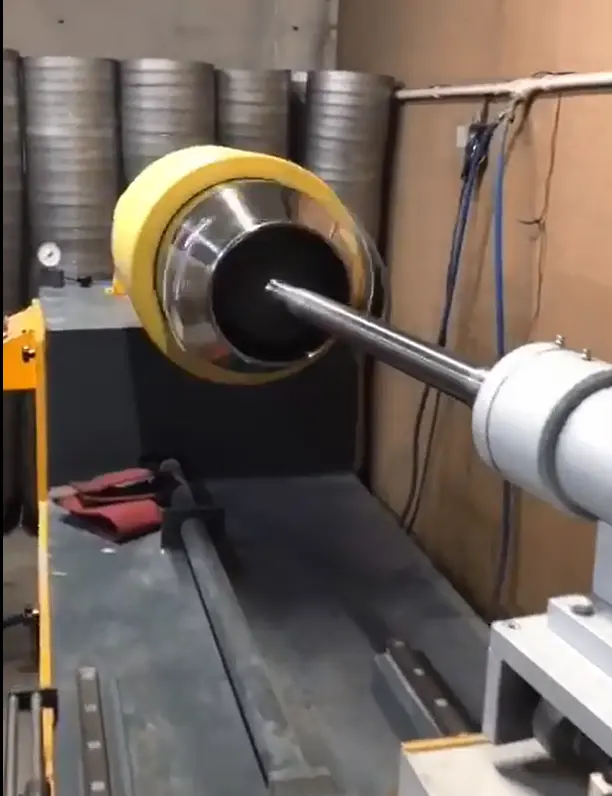
3. Robotic Buffing
Robotic buffing utilizes robotic arms equipped with buffing tools to perform precise and efficient buffing operations, especially for complex geometries and large parts.
- Advantages:
- High precision and repeatability.
- Reduced human labor and increased safety.
- Capable of handling intricate and large-scale parts.
- Disadvantages:
- High capital investment for robotic systems.
- Requires programming and maintenance expertise.
- Applications:
- Aerospace and automotive industries.
- Large metal structures and equipment.
- High-volume production of standardized parts.
Buffing Compounds and Materials
The choice of buffing compounds and materials significantly influences the quality and efficiency of the buffing process. Various compounds are used based on the type of metal and desired finish.
Buffing Compounds
Buffing compounds are abrasive materials mixed with binders that help achieve the desired finish on metal surfaces. They come in different formulations, each suited for specific applications.
a. Tripoli Compound
- Description: A coarse compound used for initial cutting and smoothing of metal surfaces.
- Applications: Ideal for removing scratches and surface imperfections on softer metals like aluminum and brass.
b. Rouge Compound
- Description: A fine compound used to achieve a high-gloss, mirror-like finish.
- Applications: Suitable for polishing precious metals such as gold and silver, as well as stainless steel.
c. White Diamond Compound
- Description: A versatile compound used for polishing and refining metal surfaces.
- Applications: Effective on plastics and metals, providing a bright finish and removing light scratches.
d. Green Chromium Oxide Compound
- Description: A compound containing chromium oxide, used for achieving a fine finish.
- Applications: Ideal for polishing stainless steel and other hard metals, offering a high level of smoothness and shine.
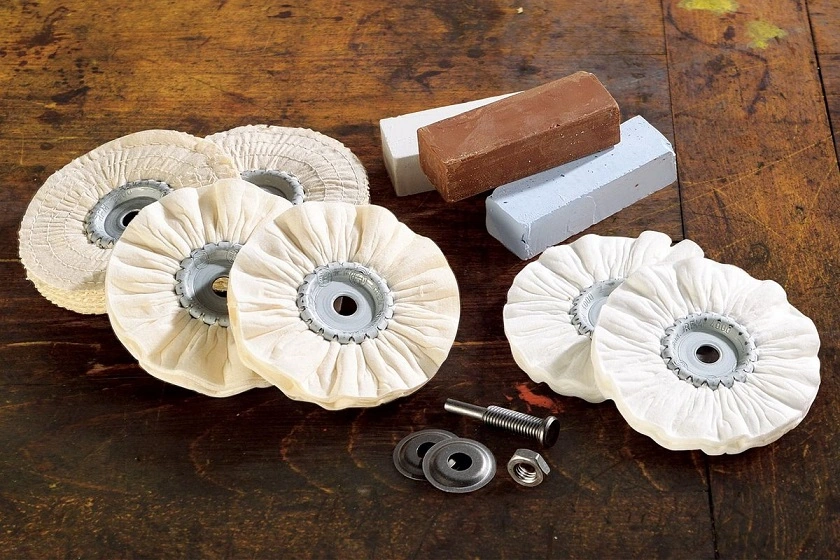
Buffing Wheels and Materials
Buffing wheels are essential tools in the buffing process, available in various materials and configurations to suit different applications.
a. Cloth Buffing Wheels
- Description: Made from cotton or flannel, cloth wheels are soft and flexible, allowing for smooth finishes.
- Applications: Commonly used for applying buffing compounds and achieving a polished finish.
b. Sisal Buffing Wheels
- Description: Made from natural fibers, sisal wheels are firm and durable, making them suitable for initial cutting and buffing stages.
- Applications: Used for aggressive cutting and removing surface imperfections before finer buffing.
c. Felt Buffing Wheels
- Description: Dense and rigid, felt wheels are used for precision buffing and achieving high-gloss finishes.
- Applications: Ideal for detailed work and achieving mirror-like finishes on metals.
Applications of Industrial Buffing
Industrial buffing is used across various industries to enhance the appearance and functionality of metal parts. Here are some key applications:
1. Automotive Industry
- Applications:
- Buffing car body panels to achieve a smooth, glossy finish.
- Polishing chrome trim and accessories for enhanced aesthetic appeal.
- Smoothing engine components and parts for improved performance.
- Benefits:
- Improves the overall appearance and marketability of vehicles.
- Enhances corrosion resistance and durability of parts.
- Prepares surfaces for additional coatings or treatments.
2. Aerospace Industry
- Applications:
- Buffing aircraft components for improved aerodynamics and aesthetics.
- Polishing turbine blades and engine parts for enhanced performance.
- Smoothing fuselage and wing surfaces for reduced drag.
- Benefits:
- Increases the efficiency and reliability of aerospace components.
- Enhances safety and performance of aircraft.
- Meets stringent industry standards for quality and precision.
3. Jewelry and Decorative Products
- Applications:
- Buffing gold, silver, and platinum jewelry to achieve a high-gloss finish.
- Polishing decorative metal items such as sculptures and ornaments.
- Enhancing the appearance of metal art pieces and custom creations.
- Benefits:
- Improves the aesthetic appeal and value of jewelry and decorative items.
- Provides a luxurious and professional finish to products.
- Enhances the durability and wear resistance of metal pieces.
4. Electronics and Appliances
- Applications:
- Buffing metal casings and components for electronics and appliances.
- Polishing stainless steel surfaces for enhanced appearance and cleanliness.
- Smoothing metal parts for improved functionality and aesthetics.
- Benefits:
- Enhances the visual appeal and marketability of products.
- Improves the performance and longevity of electronic devices.
- Provides a polished and professional finish to consumer goods.
Advancements in Industrial Buffing
The field of industrial buffing has seen significant advancements in recent years, driven by technological innovations and industry demands for improved efficiency and quality. Here are some notable advancements:
1. Automation and Robotics
The integration of automation and robotics in industrial buffing processes has revolutionized the industry, offering improved precision, efficiency, and consistency.
- Benefits:
- Reduces labor costs and human error.
- Increases production speed and throughput.
- Provides consistent and repeatable results.
- Applications:
- Automated buffing systems for automotive and aerospace components.
- Robotic buffing for large and complex parts in various industries.
- Intelligent systems with adaptive control for customized finishes.
2. Innovative Materials and Compounds
Advancements in buffing materials and compounds have led to improved performance and environmental sustainability.
- Innovative Materials:
- Eco-Friendly Compounds: Formulations that reduce environmental impact and improve safety.
- Advanced Abrasives: Developments in abrasive materials enhance cutting and polishing efficiency.
- Applications:
- High-performance compounds for demanding industrial applications.
- Environmentally friendly solutions for sustainable manufacturing practices.
- Custom formulations for specific metals and finishes.
3. Industry 4.0 and Smart Technologies
Industry 4.0 is reshaping industrial buffing through the integration of smart technologies and data-driven approaches.
- Key Aspects:
- IoT Connectivity: Enables real-time monitoring and control of buffing processes.
- Data Analytics: Provides insights into process optimization and quality control.
- AI and Machine Learning: Enhances decision-making and process automation.
- Applications:
- Smart buffing systems for adaptive process control and optimization.
- Predictive maintenance and quality assurance through data-driven insights.
- Integration of IoT and AI for intelligent manufacturing solutions.
Challenges and Solutions in Industrial Buffing
Despite its advantages, industrial buffing also presents certain challenges that need to be addressed for optimal performance and quality. Here are some common challenges and their solutions:
1. Surface Uniformity
- Challenge: Achieving consistent finishes across complex geometries and large surfaces can be difficult, leading to variations in surface quality.
- Solution: Implementing automated and robotic systems ensures uniform pressure and consistent results, reducing variations in surface quality.
2. Material Compatibility
- Challenge: Different metals have varying properties, such as hardness and corrosion resistance, that affect their compatibility with specific buffing methods and materials.
- Solution: Selecting appropriate buffing compounds and materials for each metal type ensures optimal performance and finish quality.
3. Cost and Efficiency
- Challenge: Balancing cost and efficiency in high-volume production while maintaining quality can be challenging, especially with manual buffing processes.
- Solution: Investing in automated and robotic systems reduces labor costs and increases efficiency, allowing for cost-effective production without compromising quality.
4. Environmental and Safety Concerns
- Challenge: Managing waste and emissions from buffing processes, as well as ensuring operator safety, can be challenging, especially with chemical compounds and dust generation.
- Solution: Implementing effective ventilation and filtration systems, as well as using eco-friendly compounds, minimizes environmental impact and enhances safety.
Best Practices for Industrial Buffing
To achieve optimal results in industrial buffing, it is essential to follow best practices that ensure quality, efficiency, and safety. Here are some key best practices:
1. Quality Control and Inspection
Implementing robust quality control and inspection processes ensures the consistency and reliability of buffing results.
- Visual Inspection: Identifying surface defects and irregularities to ensure uniform finishes.
- Surface Roughness Testing: Assessing surface smoothness and texture to meet quality standards.
- Dimensional Inspection: Measuring critical dimensions and tolerances to ensure precision.
2. Process Optimization
Optimizing buffing processes enhances efficiency and reduces costs, ensuring high-quality results.
- Lean Manufacturing: Minimizing waste and improving workflow for efficient production.
- Continuous Improvement: Implementing feedback loops for process refinement and optimization.
- Process Automation: Utilizing technology for increased efficiency and precision.
3. Safety Measures and Precautions
Ensuring safety in industrial buffing operations is paramount to protect workers and the environment.
- Personal Protective Equipment (PPE): Providing gloves, masks, goggles, and protective clothing to ensure operator safety.
- Ventilation and Filtration: Implementing effective air quality management systems to reduce dust and fumes.
- Training and Education: Offering ongoing training programs for workers to ensure safe practices and awareness.
4. Maintenance and Upkeep
Regular maintenance and upkeep of buffing equipment and systems ensure optimal performance and longevity.
- Routine Inspections: Conducting regular inspections and maintenance to identify and address equipment issues.
- Cleaning and Lubrication: Keeping buffing tools and equipment clean and lubricated for smooth operation.
- Calibration and Adjustments: Ensuring equipment is calibrated and adjusted for precise and consistent results.
Conclusion
Industrial buffing is a vital process in the metalworking industry, offering numerous benefits in terms of appearance, functionality, and durability. By understanding the methods, materials, applications, and advancements in buffing, manufacturers can achieve high-quality finishes and meet the evolving demands of the market. Whether through manual, automated, or robotic methods, the choice of buffing technique plays a critical role in producing superior metal products. By adhering to best practices and addressing challenges, the industry can continue to innovate and improve the efficiency and quality of industrial buffing operations.
Types of Deburring Machines
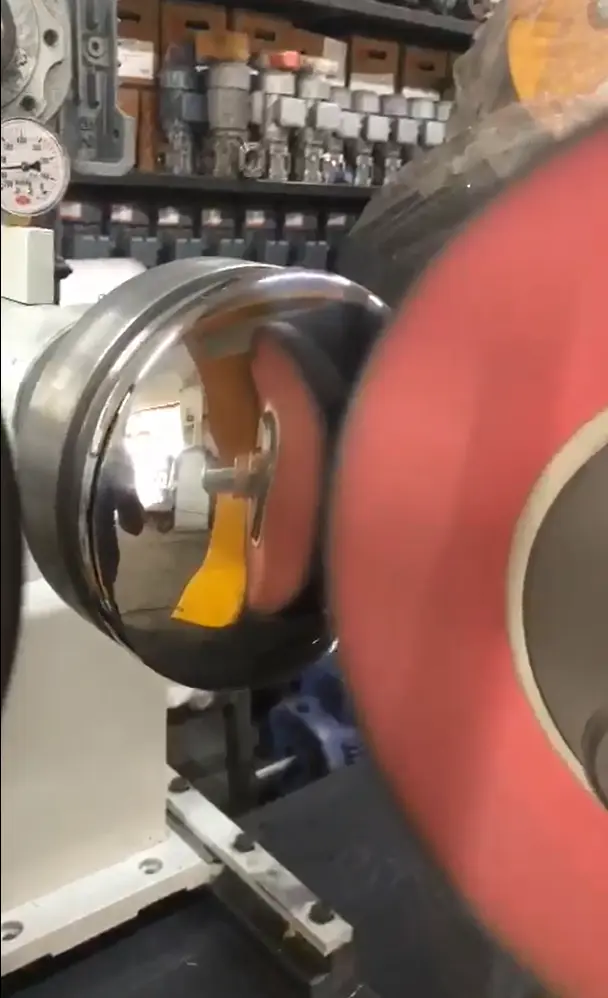
A deburring machine is an essential tool in metal fabrication, designed to remove burrs and other imperfections from metal parts. Burrs are unwanted projections of material that often occur during machining, cutting, or stamping processes. These imperfections can negatively affect the performance, safety, and appearance of metal parts, making deburring an important step in the manufacturing process.
Below, we’ll explore the various types of deburring machines, their working principles, applications, advantages, and considerations for selecting the right machine for your needs.
Deburring machines come in various types, each suited for specific applications and materials. Here are some of the most common types of deburring machines used in the industry:
1. Vibratory Deburring Machines
Description
Vibratory deburring machines use a vibrating bowl filled with abrasive media and parts to remove burrs. The vibrations cause the media to rub against the parts, effectively deburring and polishing them.
Working Principle
- Parts and abrasive media are placed inside a vibrating chamber.
- The vibrations cause the media to move in a circular motion, rubbing against the parts.
- The abrasive action of the media removes burrs and smooths the surface of the parts.
Applications
- Suitable for small to medium-sized parts.
- Ideal for batch processing of components.
- Used in industries such as automotive, aerospace, and electronics.
Advantages
- Effective for complex shapes and geometries.
- Can process multiple parts simultaneously.
- Provides a consistent and uniform finish.
Disadvantages
- Limited to smaller parts and components.
- May require longer processing times for heavy burrs.
2. Centrifugal Disc Deburring Machines
Description
Centrifugal disc deburring machines use a rotating disc to generate high-speed motion, creating a sliding movement of abrasive media against the parts.
Working Principle
- Parts and abrasive media are placed in a stationary container with a rotating disc at the bottom.
- The rotation creates a centrifugal force that causes the media to slide against the parts.
- The abrasive action removes burrs and smooths the surfaces.
Applications
- Suitable for small to medium-sized parts with intricate shapes.
- Used in industries such as jewelry, electronics, and precision engineering.
Advantages
- Provides fast and efficient deburring.
- Produces smooth and polished finishes.
- Suitable for delicate and intricate parts.
Disadvantages
- Limited to smaller parts and components.
- May not be suitable for large or heavy parts.
3. Tumbling Deburring Machines
Description
Tumbling deburring machines use a rotating barrel filled with abrasive media and parts. The rotation causes the media to tumble against the parts, removing burrs and smoothing surfaces.
Working Principle
- Parts and abrasive media are placed in a rotating barrel or drum.
- The rotation causes the media and parts to tumble against each other.
- The abrasive action of the media removes burrs and polishes the surfaces.
Applications
- Suitable for small to medium-sized parts.
- Commonly used in industries such as automotive, aerospace, and consumer goods.
Advantages
- Cost-effective and simple to operate.
- Capable of processing large batches of parts.
- Provides consistent and uniform finishes.
Disadvantages
- Limited to smaller parts and components.
- May require longer processing times for heavy burrs.
4. Magnetic Deburring Machines
Description
Magnetic deburring machines use magnetic fields to agitate small steel pins or media, which in turn deburr and polish the surfaces of metal parts.
Working Principle
- Parts are placed in a chamber with small steel pins or media.
- Magnetic fields agitate the pins, causing them to move and interact with the parts.
- The mechanical action of the pins removes burrs and polishes surfaces.
Applications
- Suitable for small, delicate, and intricate parts.
- Commonly used in industries such as electronics, medical devices, and jewelry.
Advantages
- Gentle and precise deburring.
- Suitable for intricate and delicate parts.
- Can access hard-to-reach areas.
Disadvantages
- Limited to small parts and components.
- May require additional equipment for larger parts.
5. Brush Deburring Machines
Description
Brush deburring machines use rotating brushes made from abrasive materials to remove burrs and smooth surfaces.
Working Principle
- Parts are fed through the machine where rotating brushes make contact with the surfaces.
- The abrasive action of the brushes removes burrs and smooths the surfaces.
Applications
- Suitable for flat surfaces and edges.
- Used in industries such as automotive, aerospace, and metal fabrication.
Advantages
- Effective for flat surfaces and edges.
- Provides consistent and uniform finishes.
- Can be integrated into production lines.
Disadvantages
- Limited to flat surfaces and edges.
- May not be suitable for complex shapes or intricate parts.
6. Thermal Deburring Machines
Description
Thermal deburring machines use controlled explosions of gas to burn away burrs from metal parts.
Working Principle
- Parts are placed in a chamber filled with a mixture of gases.
- The gases are ignited, creating a controlled explosion that burns away burrs.
Applications
- Suitable for complex and intricate parts.
- Commonly used in industries such as automotive, aerospace, and precision engineering.
Advantages
- Effective for hard-to-reach areas and complex shapes.
- Provides a clean and burr-free finish.
- Fast and efficient process.
Disadvantages
- High initial setup and operational costs.
- Limited to specific materials and applications.
7. Electrochemical Deburring Machines
Description
Electrochemical deburring machines use electrolytic solutions to dissolve burrs from metal parts.
Working Principle
- Parts are submerged in an electrolytic bath with an electric current applied.
- The current causes the burrs to dissolve, leaving a smooth surface.
Applications
- Suitable for precision and intricate parts.
- Used in industries such as aerospace, medical devices, and electronics.
Advantages
- Precise and controlled deburring.
- Minimal tool wear and surface damage.
- Suitable for intricate and delicate parts.
Disadvantages
- Requires careful handling of chemicals.
- High operational costs.
Selecting the Right Deburring Machine
Choosing the right deburring machine involves considering several factors, including the type of metal, the size and complexity of the parts, and the desired finish. Here are some key considerations for selecting the right deburring machine:
1. Type of Metal
Different metals have varying properties that affect their deburring requirements. Consider the hardness, ductility, and conductivity of the metal when selecting a deburring machine.
2. Size and Complexity of Parts
The size and complexity of the parts influence the choice of deburring machine. Consider the geometry, size, and intricacy of the parts to determine the most suitable machine.
3. Desired Finish
The desired finish and surface quality of the parts play a crucial role in selecting the right deburring machine. Consider the level of smoothness, precision, and appearance required for the finished parts.
4. Production Volume
The scale of production impacts the choice of deburring machine. Consider the production volume and batch size to determine whether manual or automated machines are more suitable.
5. Cost and Efficiency
Evaluate the overall cost and efficiency of the deburring process, including equipment, labor, and materials, to determine the most cost-effective solution without compromising quality.
6. Environmental and Safety Considerations
Consider the environmental impact and safety of the deburring process, including waste management and operator safety, when selecting a machine. Some machines may require special handling and disposal procedures for chemicals or emissions.
Advantages of Deburring Machines
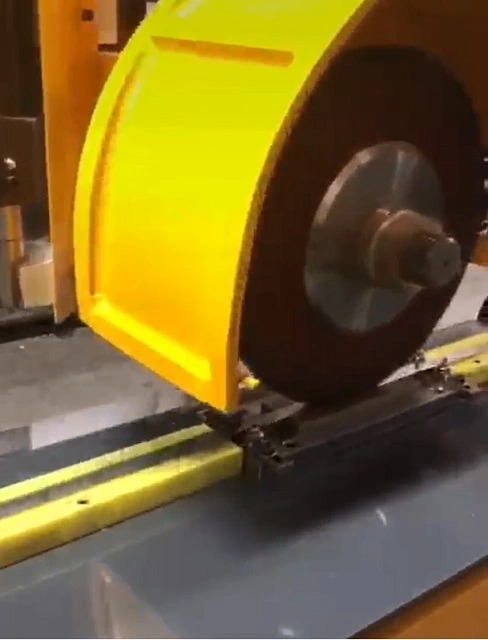
Deburring machines offer several advantages over manual deburring methods, making them essential tools in modern manufacturing processes. Here are some key advantages of using deburring machines:
1. Improved Efficiency and Productivity
Deburring machines automate the deburring process, significantly reducing the time and labor required compared to manual methods. This results in increased efficiency and productivity in manufacturing operations.
2. Consistent and Uniform Finishes
Deburring machines provide consistent and uniform finishes across batches, ensuring high-quality results with minimal variations in surface quality. This is particularly important for precision parts and components.
3. Reduced Labor Costs
Automated deburring machines reduce the need for manual labor, leading to lower labor costs and improved resource allocation in manufacturing operations.
4. Enhanced Safety
Deburring machines reduce the risk of operator injuries associated with manual deburring processes, such as cuts and abrasions. Additionally, automated machines minimize the exposure to hazardous materials and chemicals.
5. Versatility and Flexibility
Deburring machines offer versatility and flexibility in handling a wide range of parts and materials, making them suitable for various industries and applications.
6. Precision and Accuracy
Deburring machines provide precise and accurate deburring, ensuring high-quality finishes with minimal surface damage or tool wear.
Challenges and Solutions in Deburring
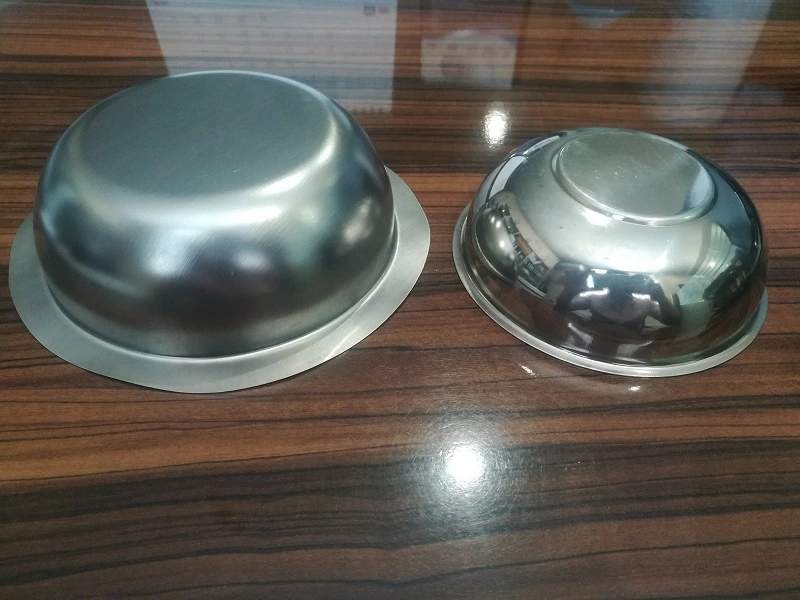
Despite their advantages, deburring machines also present certain challenges that need to be addressed for optimal performance and quality. Here are some common challenges and their solutions:
1. Material Compatibility
Challenge: Different materials require specific deburring techniques, which can impact the selection of deburring machines and abrasive media.
Solution: Select appropriate deburring machines and materials for each metal type to ensure optimal performance and finish quality.
2. Surface Uniformity
Challenge: Achieving consistent finishes across complex geometries and large surfaces can be difficult, leading to variations in surface quality.
Solution: Implement automated and robotic systems to ensure uniform pressure and consistent results, reducing variations in surface quality.
3. Cost and Efficiency
Challenge: Balancing cost and efficiency in high-volume production while maintaining quality can be challenging, especially with manual deburring processes.
Solution: Invest in automated and robotic systems to reduce labor costs and increase efficiency, allowing for cost-effective production without compromising quality.
4. Environmental and Safety Concerns
Challenge: Managing waste and emissions from deburring processes, as well as ensuring operator safety, can be challenging, especially with chemical compounds and dust generation.
Solution: Implement effective ventilation and filtration systems, as well as use eco-friendly compounds, to minimize environmental impact and enhance safety.
Best Practices for Using Deburring Machines
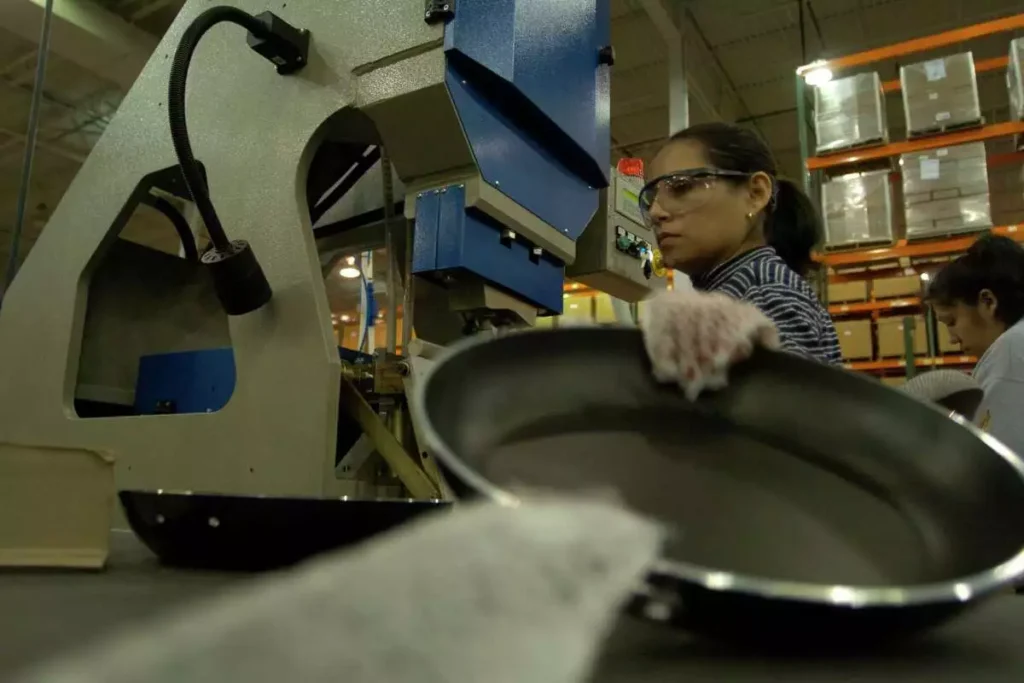
To achieve optimal results in deburring, it is essential to follow best practices that ensure quality, efficiency, and safety. Here are some key best practices for using deburring machines:
1. Quality Control and Inspection
Implement robust quality control and inspection processes to ensure the consistency and reliability of deburring results.
- Visual Inspection: Identify surface defects and irregularities to ensure uniform finishes.
- Surface Roughness Testing: Assess surface smoothness and texture to meet quality standards.
- Dimensional Inspection: Measure critical dimensions and tolerances to ensure precision.
2. Process Optimization
Optimize deburring processes to enhance efficiency and reduce costs, ensuring high-quality results.
- Lean Manufacturing: Minimize waste and improve workflow for efficient production.
- Continuous Improvement: Implement feedback loops for process refinement and optimization.
- Process Automation: Utilize technology for increased efficiency and precision.
3. Safety Measures and Precautions
Ensure safety in deburring operations to protect workers and the environment.
- Personal Protective Equipment (PPE): Provide gloves, masks, goggles, and protective clothing to ensure operator safety.
- Ventilation and Filtration: Implement effective air quality management systems to reduce dust and fumes.
- Training and Education: Offer ongoing training programs for workers to ensure safe practices and awareness.
4. Maintenance and Upkeep
Regular maintenance and upkeep of deburring equipment and systems ensure optimal performance and longevity.
- Routine Inspections: Conduct regular inspections and maintenance to identify and address equipment issues.
- Cleaning and Lubrication: Keep deburring tools and equipment clean and lubricated for smooth operation.
- Calibration and Adjustments: Ensure equipment is calibrated and adjusted for precise and consistent results.
Conclusion
Deburring machines play a crucial role in the metalworking industry, providing efficient and effective solutions for removing burrs and imperfections from metal parts. By understanding the types, applications, and considerations for selecting deburring machines, manufacturers can achieve high-quality finishes and meet the evolving demands of the market. Whether through vibratory, centrifugal, tumbling, or advanced methods like thermal and electrochemical deburring, the choice of deburring machine plays a critical role in producing superior metal products. By adhering to best practices and addressing challenges, the industry can continue to innovate and improve the efficiency and quality of deburring operations.
If you have any further questions or need more detailed information on specific aspects of deburring machines, feel free to ask!
Best Deburring Techniques
Deburring is a crucial step in metalworking and manufacturing that involves removing burrs—unwanted protrusions or rough edges—resulting from machining, cutting, drilling, or stamping processes. The presence of burrs can negatively affect the performance, safety, and aesthetics of metal parts. Therefore, selecting the best deburring techniques is essential for achieving smooth, functional, and visually appealing products.
Below, we’ll explore the most effective deburring techniques, their applications, advantages, disadvantages, and considerations for choosing the right method for specific needs.
1. Manual Deburring
Manual deburring involves using hand tools to remove burrs from metal parts. It is one of the oldest and most straightforward methods, offering flexibility and precision for small-scale or intricate tasks.
Tools Used
- Files: Metal files are used to manually scrape and smooth burrs off the edges of metal parts. Available in various shapes and sizes to match specific needs.
- Scrapers: Sharp, flat tools used for removing burrs from flat surfaces and edges.
- Abrasive Pads: Scouring pads that can be used to smooth out small imperfections and surface burrs.
- Rotary Tools: Dremel-like tools with small abrasive attachments for precise deburring of intricate areas.
Applications
- Suitable for small batches and custom jobs.
- Ideal for intricate and delicate parts where precision is critical.
- Commonly used in the aerospace, automotive, and jewelry industries.
Advantages
- Low initial investment and setup costs.
- Provides precise control over the deburring process.
- Flexibility to handle various part sizes and shapes.
Disadvantages
- Labor-intensive and time-consuming for large volumes.
- Inconsistent results due to human error.
- Limited efficiency for high-volume production.
Best Practices
- Ensure operators are well-trained and skilled in using manual tools.
- Use appropriate safety gear, such as gloves and goggles, to protect against metal filings.
- Regularly maintain and sharpen tools to ensure efficiency and precision.
2. Mechanical Deburring
Mechanical deburring involves using machines to automate the deburring process. This method is suitable for high-volume production and can handle various part sizes and shapes.
Types of Mechanical Deburring
a. Vibratory Deburring
- Process: Uses a vibrating container filled with abrasive media to deburr parts. The vibration causes the media to rub against the parts, removing burrs.
- Applications: Suitable for small to medium-sized parts with complex geometries.
- Advantages: Handles multiple parts simultaneously, consistent finishes, effective for complex shapes.
- Disadvantages: Limited to smaller parts, longer processing times for heavy burrs.
b. Tumbling Deburring
- Process: Uses a rotating barrel filled with abrasive media and parts. The rotation causes the media to tumble against the parts, removing burrs.
- Applications: Ideal for small parts and batch processing.
- Advantages: Cost-effective, simple operation, capable of processing large batches.
- Disadvantages: Limited to smaller parts, may require longer processing times for heavy burrs.
c. Brush Deburring
- Process: Involves using rotating brushes made from abrasive materials to remove burrs from flat surfaces and edges.
- Applications: Suitable for flat surfaces and edges, used in industries such as automotive and aerospace.
- Advantages: Consistent finishes, can be integrated into production lines, effective for flat surfaces.
- Disadvantages: Limited to flat surfaces, not suitable for intricate shapes.
Best Practices
- Choose the right abrasive media for the specific material and part geometry.
- Regularly monitor and maintain machinery to ensure optimal performance.
- Adjust processing times and media compositions based on part specifications and desired finishes.
3. Thermal Deburring
Thermal deburring is an advanced method that uses controlled explosions of gas to remove burrs from metal parts. It is particularly effective for complex and intricate parts.
Process
- Parts are placed in a chamber filled with a mixture of combustible gases, such as hydrogen and oxygen.
- The gases are ignited, creating a controlled explosion that burns away burrs.
Applications
- Suitable for intricate and complex parts with hard-to-reach areas.
- Commonly used in the automotive and aerospace industries.
Advantages
- Effective for hard-to-reach areas and complex shapes.
- Provides a clean and burr-free finish.
- Fast and efficient process for large volumes.
Disadvantages
- High initial setup and operational costs.
- Limited to specific materials that can withstand high temperatures.
- Requires careful handling and safety measures.
Best Practices
- Ensure the chamber and parts are properly sealed to prevent gas leaks.
- Conduct thorough safety checks and adhere to safety protocols to prevent accidents.
- Regularly maintain equipment to ensure consistent and safe operation.
4. Electrochemical Deburring
Electrochemical deburring uses electrolytic solutions to dissolve burrs from metal parts. This method is precise and effective for parts with complex geometries.
Process
- Parts are submerged in an electrolytic bath with an electric current applied.
- The current causes the burrs to dissolve, leaving a smooth surface.
Applications
- Suitable for precision parts and intricate geometries.
- Used in industries such as aerospace, medical devices, and electronics.
Advantages
- Precise and controlled deburring.
- Minimal tool wear and surface damage.
- Suitable for intricate and delicate parts.
Disadvantages
- Requires careful handling of chemicals and electrolytes.
- High operational costs and initial setup.
- Limited to conductive materials.
Best Practices
- Use appropriate personal protective equipment (PPE) to handle chemicals safely.
- Regularly test and maintain electrolyte solutions to ensure effective deburring.
- Optimize current levels and exposure times based on part specifications.
5. High-Pressure Water Jet Deburring
High-pressure water jet deburring uses water jets to remove burrs and clean metal surfaces. This technique is suitable for parts that are sensitive to heat and require precision deburring.
Process
- High-pressure water jets are directed at the metal parts, removing burrs through the force of the water.
- The process may involve rotating nozzles to reach all areas of the part.
Applications
- Suitable for heat-sensitive materials and precision components.
- Commonly used in the aerospace, automotive, and medical device industries.
Advantages
- No thermal distortion or material stress.
- Environmentally friendly, as it uses water instead of chemicals.
- Effective for precision and intricate parts.
Disadvantages
- High initial setup costs for equipment.
- Limited to parts that can withstand high water pressure.
- May require additional drying processes after deburring.
Best Practices
- Ensure proper pressure levels and nozzle configurations for effective deburring.
- Implement drying procedures to prevent corrosion or water damage.
- Regularly inspect and maintain equipment to ensure consistent performance.
6. Cryogenic Deburring
Cryogenic deburring uses extremely low temperatures to embrittle burrs, making them easier to remove. This method is effective for flexible or rubber-like materials that are difficult to deburr using traditional methods.
Process
- Parts are exposed to cryogenic temperatures using liquid nitrogen or similar substances.
- The low temperature makes the burrs brittle, allowing them to be easily removed by tumbling or blasting.
Applications
- Suitable for plastic, rubber, and flexible materials.
- Commonly used in the automotive, electronics, and medical device industries.
Advantages
- Effective for materials that are difficult to deburr using traditional methods.
- Minimal impact on the part’s structural integrity.
- Environmentally friendly, as it uses no chemicals.
Disadvantages
- Limited to materials that can withstand low temperatures.
- High setup and operational costs for cryogenic equipment.
- May require additional processes to remove residual cold materials.
Best Practices
- Ensure proper handling and safety measures when using cryogenic materials.
- Optimize exposure times and temperatures based on material specifications.
- Regularly maintain equipment to ensure efficient and safe operation.
Comparison of Deburring Techniques
Here’s a comparison table summarizing the advantages, disadvantages, and applications of each deburring technique:
| Technique | Advantages | Disadvantages | Applications |
|---|---|---|---|
| Manual Deburring | Low cost, precise control, flexible for various shapes | Labor-intensive, inconsistent results, limited efficiency | Small batches, custom jobs, intricate parts |
| Vibratory Deburring | Consistent finishes, handles complex shapes, batch processing | Limited to smaller parts, longer processing times | Small to medium-sized parts, complex geometries |
| Tumbling Deburring | Cost-effective, simple operation, large batch processing | Limited to smaller parts, longer processing times | Small parts, batch processing |
| Brush Deburring | Consistent finishes, integrated into production lines | Limited to flat surfaces, not suitable for intricate shapes | Flat surfaces, edges, automotive and aerospace |
| Thermal Deburring | Effective for complex shapes, fast and efficient | High costs, limited to specific materials, safety concerns | Intricate parts, automotive, aerospace |
| Electrochemical Deburring | Precise deburring, minimal tool wear, suitable for intricate parts | Requires chemical handling, high costs, limited to conductive materials | Precision parts, aerospace, medical devices |
| High-Pressure Water Jet | No thermal distortion, environmentally friendly | High costs, limited to parts that can withstand water pressure | Heat-sensitive materials, precision components |
| Cryogenic Deburring | Effective for flexible materials, minimal impact on structural integrity | Limited to low-temperature materials, high costs | Plastic, rubber, flexible materials |
Factors to Consider When Choosing a Deburring Technique
Selecting the right deburring technique depends on several factors, including the type of material, part geometry, production volume, and desired finish. Here are some key considerations:
- Material Type: Different materials have varying properties that affect their deburring requirements. Consider the hardness, ductility, and thermal sensitivity of the material when choosing a deburring method.
- Part Geometry: The shape and complexity of the parts influence the choice of deburring technique. Intricate geometries may require advanced methods like electrochemical or thermal deburring for effective results.
- Production Volume: The scale of production impacts the choice of deburring technique, with high-volume production benefiting from automated methods and small-batch or custom work requiring manual techniques.
- Cost and Efficiency: Evaluate the overall cost and efficiency of the deburring process, including equipment, labor, and materials, to determine the most cost-effective solution without compromising quality.
- Environmental and Safety Considerations: Consider the environmental impact and safety of the deburring process, including waste management and operator safety. Some methods may require special handling and disposal procedures for chemicals or emissions.
- Desired Finish: The intended surface quality of the finished product influences the choice of deburring technique. For instance, precision parts with tight tolerances may benefit from electrochemical deburring, while simpler parts may be effectively deburred using mechanical methods.
Conclusion
Deburring is a vital process in manufacturing, significantly impacting the quality and functionality of metal parts. By understanding the strengths and limitations of each deburring technique, manufacturers can select the most appropriate method to achieve the desired finish and meet specific application requirements. Whether through manual, mechanical, thermal, or advanced methods, the choice of deburring technique plays a critical role in producing high-quality, durable metal products. By adhering to best practices and addressing challenges, the industry can continue to innovate and improve the efficiency and quality of deburring operations.
EMS Metalworking Machinery
We design, manufacture and assembly metalworking machinery such as:
- Hydraulic transfer press
- Glass mosaic press
- Hydraulic deep drawing press
- Casting press
- Hydraulic cold forming press
- Hydroforming press
- Composite press
- Silicone rubber moulding press
- Brake pad press
- Melamine press
- SMC & BMC Press
- Labrotaroy press
- Edge cutting trimming machine
- Edge curling machine
- Trimming beading machine
- Trimming joggling machine
- Cookware production line
- Pipe bending machine
- Profile bending machine
- Bandsaw for metal
- Cylindrical welding machine
- Horizontal pres and cookware
- Kitchenware, hotelware
- Bakeware and cuttlery production machinery
as a complete line as well as an individual machine such as:
- Edge cutting trimming beading machines
- Polishing and grinding machines for pot and pans
- Hydraulic drawing presses
- Circle blanking machines
- Riveting machine
- Hole punching machines
- Press feeding machine
You can check our machinery at work at: EMS Metalworking Machinery – YouTube
Applications:
- Beading and ribbing
- Flanging
- Trimming
- Curling
- Lock-seaming
- Ribbing
- Flange-punching